My hallway used to be this sad, dark tunnel that nobody wanted to walk through. You know the type—narrow, dim, basically just a necessary evil between rooms. Then I discovered the IKEA mirror wall trick, and suddenly that dead space became the part of my house people actually compliment.
The best part? The whole project cost me under $100 and took maybe two hours. If you can hang a picture frame, you can do this.
Why IKEA Mirror Walls Actually Work
Look, IKEA gets a lot of jokes about confusing instructions and Allen wrenches, but their mirrors are legitimately good. They’re affordable, they come in consistent styles you can mix and match, and they’re designed to be idiot-proof to install (speaking from experience here).
Here’s what makes an IKEA mirror wall special:
- Multiple mirrors create more visual interest than one big one
- The repetition makes small spaces feel intentional, not cramped
- Black frames are having a moment and work with everything
- You can start with a few mirrors and add more later
- The reflection bounces light around dark hallways like magic
I started with three LOTS mirrors (the basic square ones) and kept adding until it felt right. That’s the beauty of this approach—it grows with your vision and your budget.
The Hallway Problem We All Have
Hallways are weird, right? They’re necessary but nobody really knows what to do with them. Too narrow for furniture, too long to leave blank, too awkward to decorate properly.
I’ve lived in apartments where the hallway was literally just beige walls and overhead lighting that made everyone look vaguely unwell. Not exactly welcoming.
Common hallway issues:
- They feel like wasted space
- They’re usually darker than other rooms
- They’re often too narrow for substantial decor
- They can feel like tunnels instead of transitions
Mirrors solve basically all of these problems at once. They reflect whatever light you have, they don’t take up floor space, and they create visual interest without cluttering a narrow area.
Choosing Your IKEA Mirrors
IKEA has way more mirror options than you’d think. I’ve probably tried half of them at this point (返回shopping addiction is real), so let me break down what actually works for hallway projects.
The LOTS Mirror: The Budget MVP
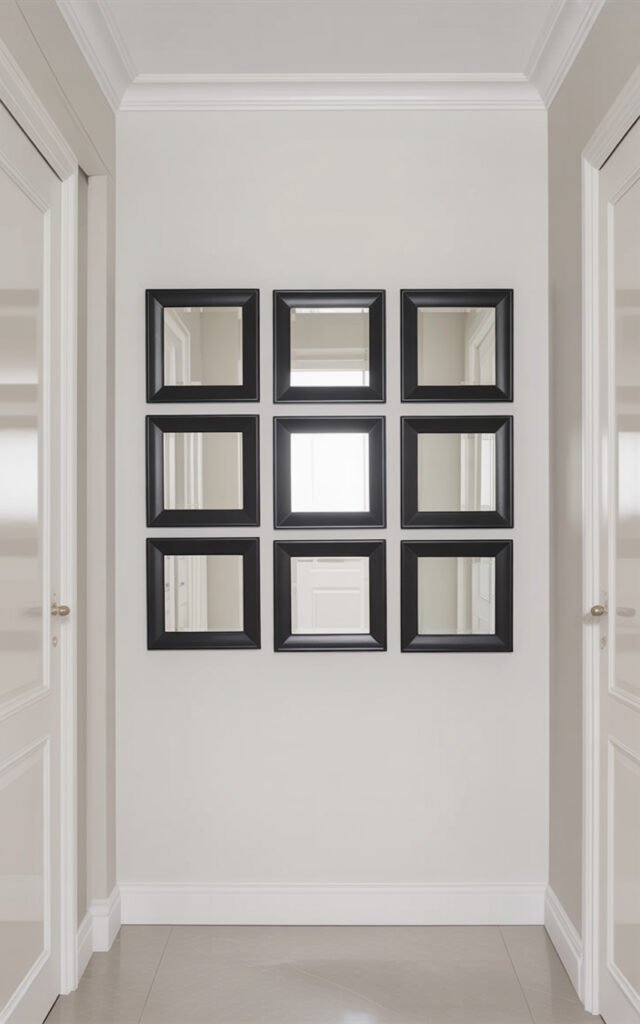
These are the square ones with thin black frames. They’re like $5 each, which is almost suspiciously cheap. I used nine of them in a 3×3 grid pattern, and the whole thing cost me $45 plus the wall anchors.
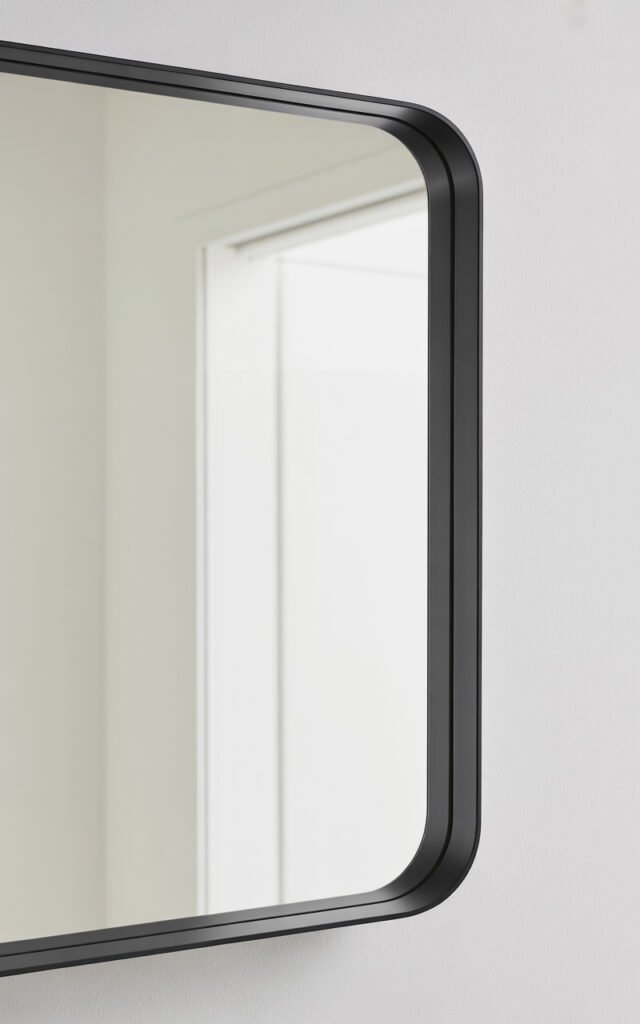
They’re lightweight, so you don’t need heavy-duty hardware. The frames are plastic but honestly look fine from a normal viewing distance. For a budget project, these can’t be beat.
The ÄNGSJÖN Mirror: Slightly Fancier
These have slightly thicker frames and come in a few sizes. They’re around $15-30 depending on size, so middle-of-the-road price-wise. The frames feel more substantial, and they come in both black and white.
I mixed different sizes of ÄNGSJÖN mirrors in my entryway—two large, three medium, one small. The variation in size makes it feel more curated and less cookie-cutter.
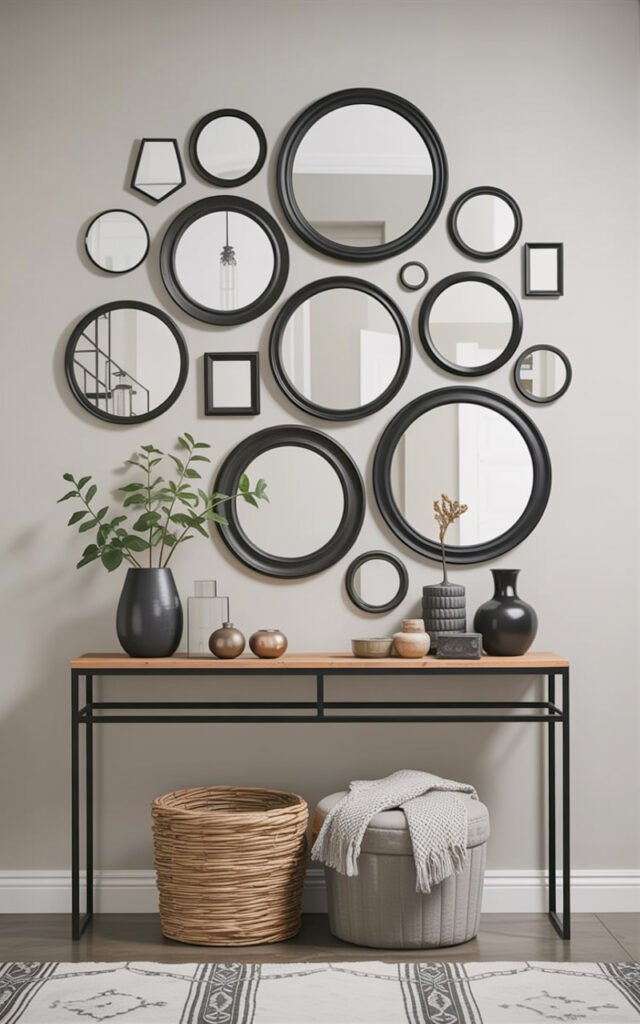
The LINDBYN Mirror: Round Option
If you want to break up the rectangular vibe, these round black-framed mirrors are perfect. They’re $30-40 but make a statement. I’ve seen people mix round LINDBYN mirrors with square LOTS mirrors, and it looks really dynamic.

Pro tip: odd numbers usually look better than even when you’re arranging different-sized mirrors.
Planning Your Mirror Wall Layout
This is where people either nail it or end up with weirdly spaced mirrors that bug them forever. Don’t wing this part—trust me.
What I learned the hard way:
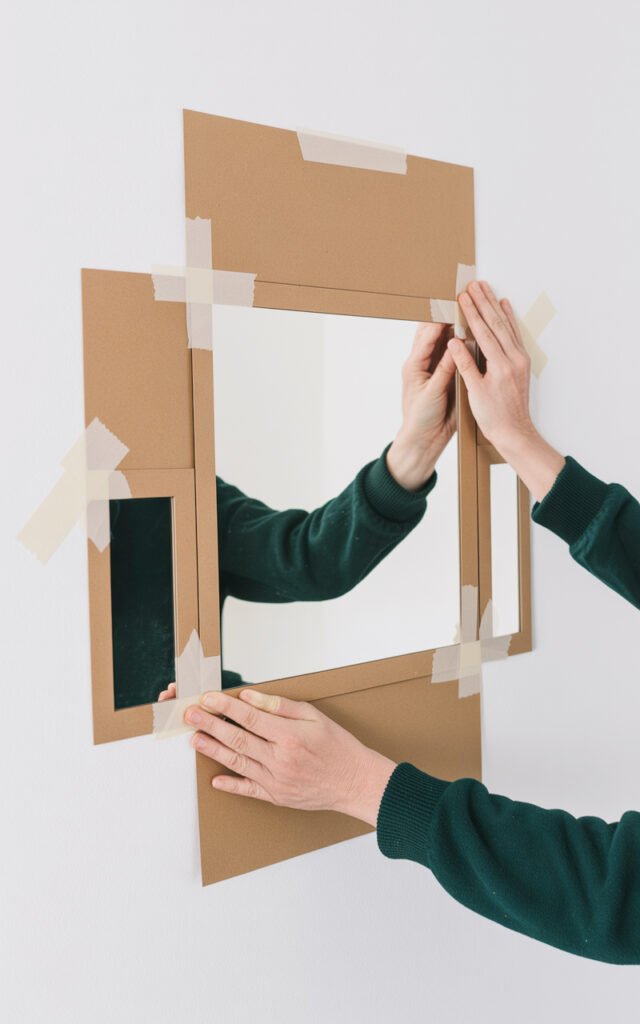
Start by measuring your wall and marking the center point. Then cut paper templates the exact size of your mirrors and tape them to the wall. Step back, take a photo, live with it for a day. Move stuff around until it feels right.
I know it sounds excessive, but I once hung six mirrors in a pattern I hated and had to redo the whole thing. Those extra nail holes still haunt me.
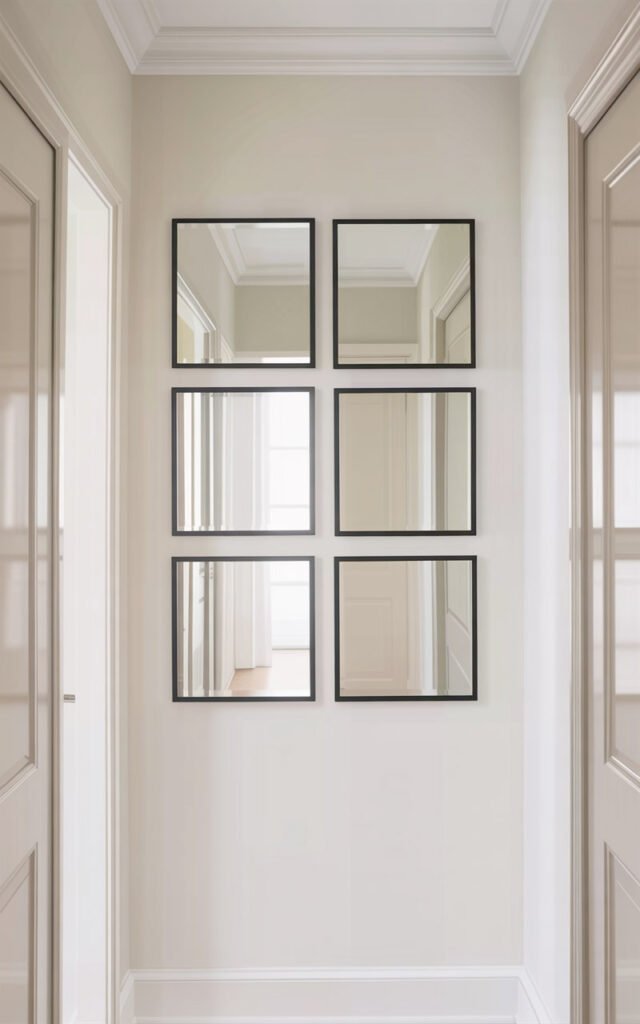
Grid Pattern: The Safe Bet
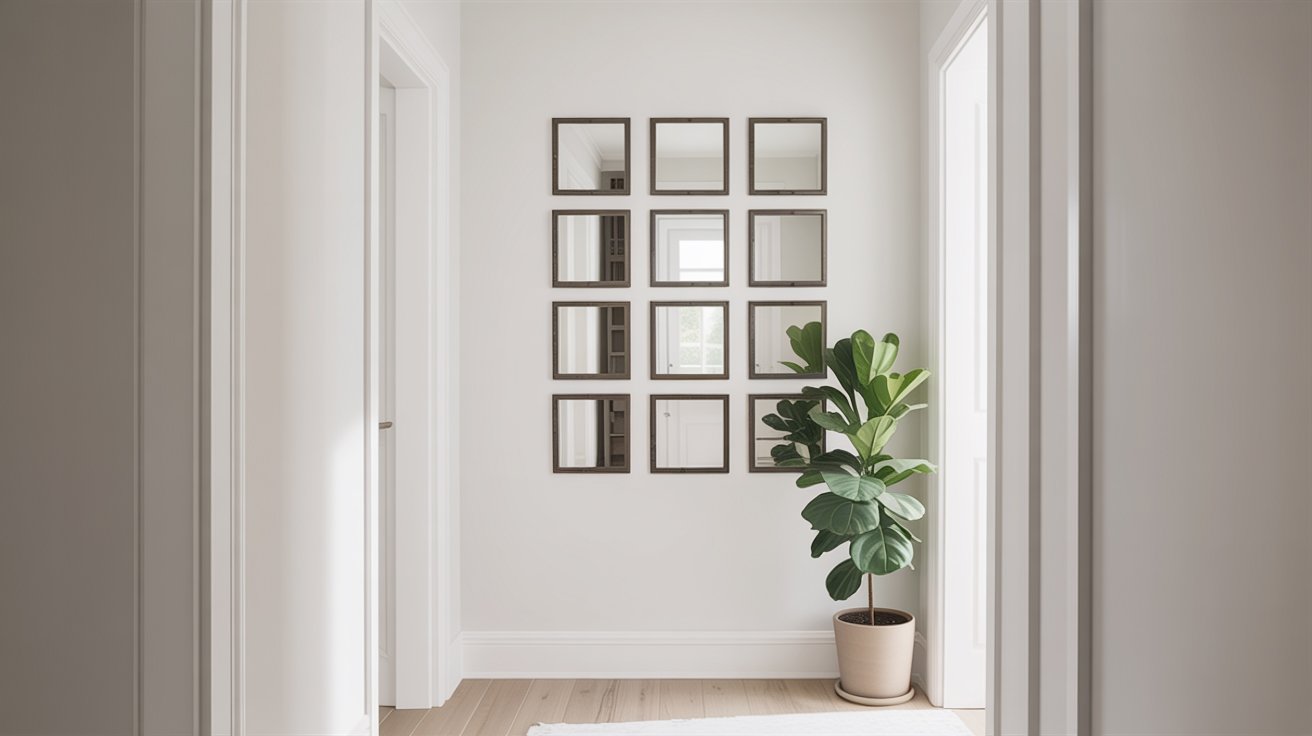
This is what I did first—a simple 3×3 grid of identical square mirrors. Super clean, very symmetrical, basically foolproof. It’s giving “gallery wall but make it mirrors” energy.
Grid pattern tips:
- Keep spacing consistent (I used 2 inches between each mirror)
- Use a level for EVERY mirror (it matters more than you think)
- Start from the center and work outward
- Mark all your spots with pencil before putting a single nail in
Asymmetrical Arrangement: For The Brave
Once I got confident, I tried an asymmetrical arrangement with different-sized mirrors. This looks more collected and intentional, but it’s trickier to get right.

The key is having some organizing principle—maybe they all line up along one edge, or there’s a clear focal point mirror with smaller ones around it. Random chaos doesn’t work; organized variety does.
Vertical Vs. Horizontal
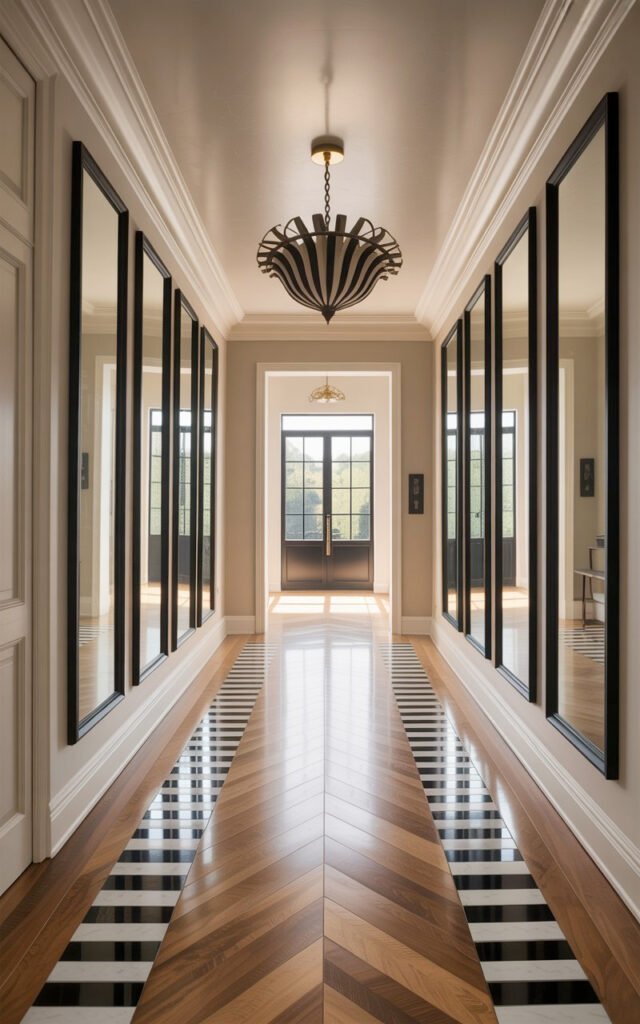
Your wall dimensions matter. My hallway is long and narrow, so I did a horizontal arrangement that draws the eye along the wall. If you have a short, tall wall, vertical makes more sense.
I’ve also seen people do floor-to-ceiling mirror installations, and they’re dramatic as hell. That’s more mirrors and more money, but if you’ve got the wall space and the budget, it’s stunning.
Installation: The Actual Process
Okay, you’ve got your mirrors, you’ve planned your layout, now comes the hanging part. This is way easier than it seems, I promise.
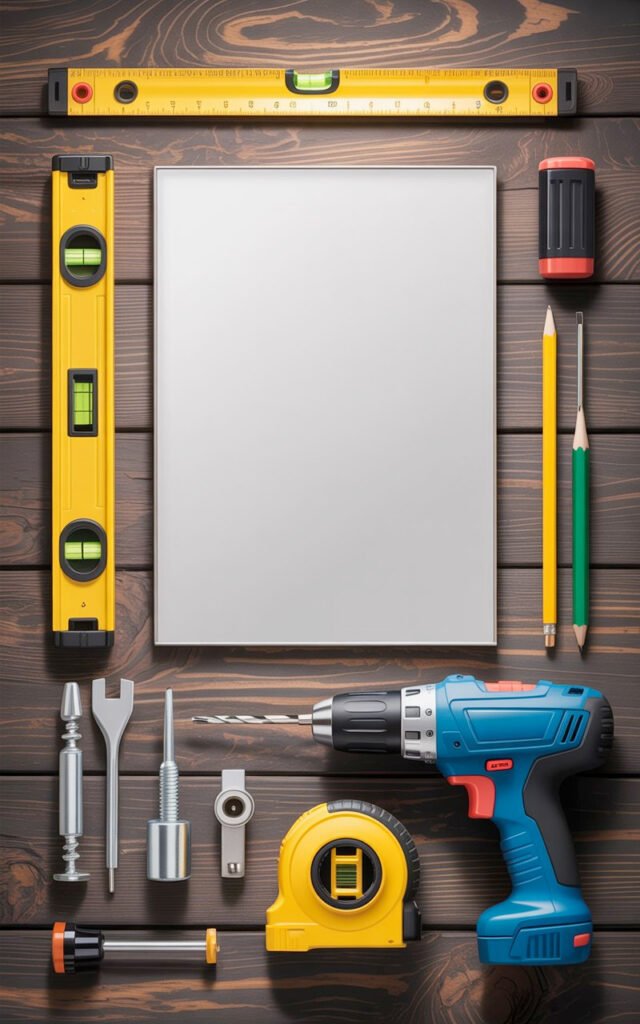
What you actually need:
- Level (seriously, don’t skip this)
- Measuring tape
- Pencil for marking
- Appropriate wall anchors for your wall type
- Drill or screwdriver
- Patience (cannot buy at IKEA unfortunately)
IKEA mirrors usually come with hanging hardware, but sometimes you need to buy proper wall anchors separately, especially if you’re not hitting studs.
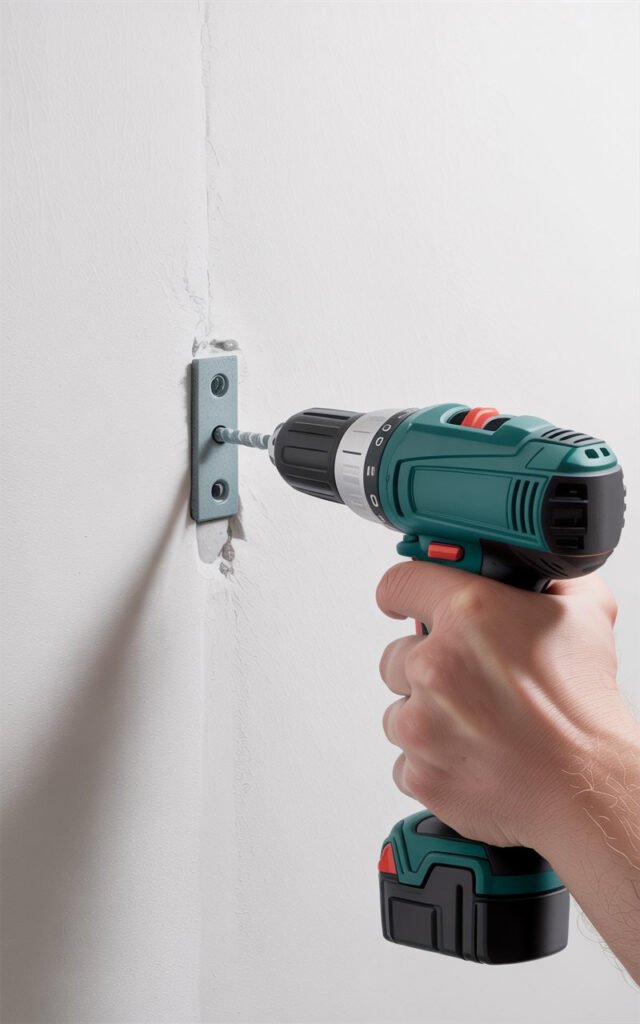
Finding Studs (Or Not)
If you can anchor into studs, great. If not (and in most hallways you can’t hit studs for every mirror in a multi-mirror arrangement), use proper drywall anchors rated for the weight.
Those little plastic anchors that come with some mirrors? Throw them away. Get the self-drilling anchors or toggle bolts that can actually hold weight. I learned this when a mirror fell off my wall at 2am and scared me half to death.
Spacing Tricks
For uniform spacing between mirrors, I cut a piece of cardboard to my desired width (2 inches for me) and used it as a spacer while marking positions. Way easier than measuring repeatedly and getting slightly different numbers each time.
Mark the top corners of where each mirror will go. Then you can easily see if everything lines up before committing with the drill.
Styling Around Your Mirror Wall
The mirrors are the star, but what you put around them matters too. You want to enhance, not compete.
What works:
- A console table or narrow bench below (if space allows)
- One large plant (the green against black frames is chef’s kiss)
- Minimal wall art on adjacent walls
- Good lighting that the mirrors can reflect

What doesn’t work: cluttering the area with too much stuff. The mirrors create visual interest on their own—let them breathe.
I’ve got a snake plant in a simple black pot next to my mirror wall, and that’s honestly all it needs. The mirrors reflect the plant, which doubles its impact without doubling your plant care duties. 🙂
Lighting Makes Or Breaks It
Here’s something I didn’t realize until after I installed mine: the lighting you have dramatically affects how good your mirror wall looks.
Harsh overhead lighting? The mirrors will reflect that and create weird shadows. But warm, well-placed lighting? Suddenly your hallway looks like it belongs in a magazine.
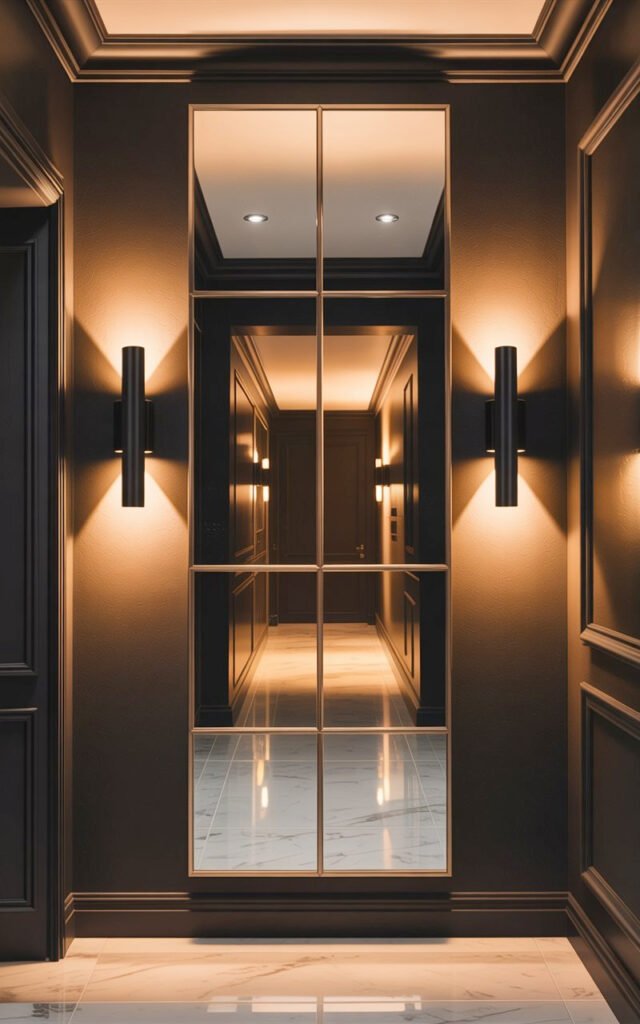
Lighting options that work:
- Wall sconces flanking the mirror wall
- Picture lights above (yes, for mirrors too)
- String lights for a softer vibe (yes, even in hallways)
- Natural light from nearby windows or doors
I added two simple black wall sconces on either side of my mirror wall, and it completely changed the vibe. The mirrors reflect and multiply that warm light, making the whole space feel bigger and cozier.
Budget Breakdown: What It Actually Costs
Because I’m not going to pretend this costs nothing, even though it’s budget-friendly.
Minimal version ($50-70):
- 6-9 LOTS mirrors ($30-45)
- Wall anchors and hardware ($10-15)
- Basic tools you might already have
Mid-range version ($100-150):
- Mix of LOTS and ÄNGSJÖN mirrors ($70-100)
- Better wall anchors ($15-20)
- Optional: simple lighting ($20-30)
Elevated version ($200-300):
- LINDBYN and ÄNGSJÖN mirrors ($150-200)
- Professional-grade hanging hardware ($20-30)
- Wall sconces or picture lights ($50-70)
I’ve done all three versions in different spaces, and honestly, even the budget version looks great if you plan well and install carefully.
Common Mistakes To Avoid
Let me save you from the things I screwed up:
Don’t eyeball the spacing. I tried this once. Never again. Measure everything, use a level, check twice.
Don’t use cheap wall anchors. Your mirrors will fall. Maybe not today, maybe not tomorrow, but they will fall. Spend the extra $10 on good anchors.
Don’t forget about what’s reflected. Before finalizing your layout, check what the mirrors are reflecting. If it’s a pile of shoes or a messy closet, maybe adjust the angle or position.
Don’t rush the installation. I know you want to be done, but taking your time means not having to redo things later when they’re crooked or falling off.
Small Hallway Vs. Large Hallway
The size of your space changes your approach a bit.
Small/Narrow Hallways
Stick with smaller mirrors in a tighter arrangement. You want to enhance the space, not overwhelm it. I’d go with 4-6 mirrors maximum, probably all the same size for cohesion.
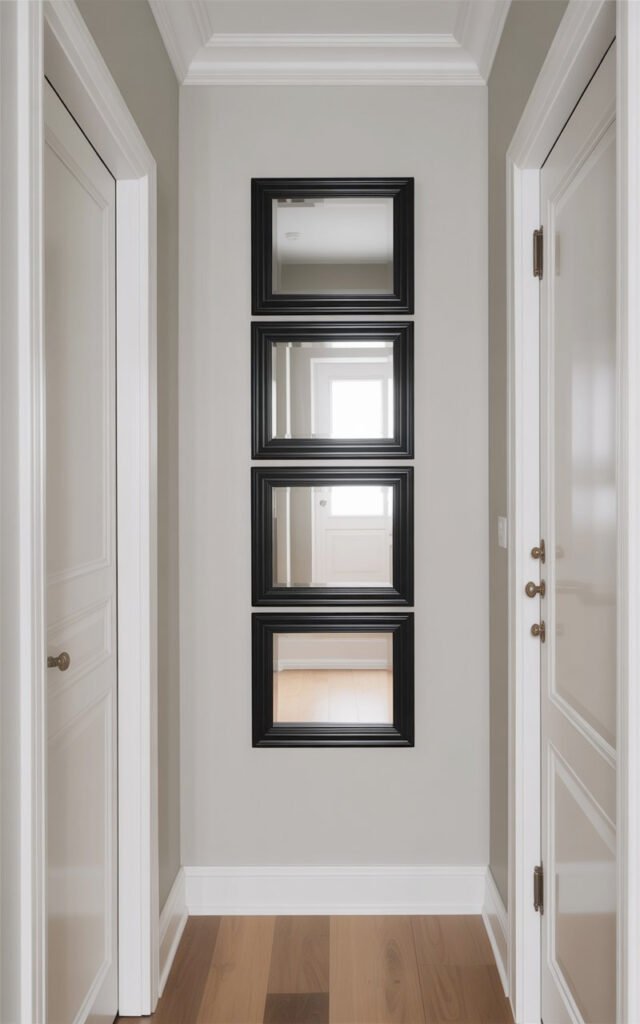
Vertical arrangements can make low ceilings feel higher. It’s a visual trick but it genuinely works.
Larger Hallways
You can go bigger and bolder. More mirrors, larger sizes, more dramatic arrangements. A large hallway can handle a floor-to-ceiling situation or a really wide horizontal spread.
Just maintain that balance—even in a big space, you don’t want it to feel cluttered or busy.
Entryway Applications
While we’re talking hallways, let’s address entryways specifically because the mirror wall trick works amazing there too.
Your entryway is the first thing people see when they visit. A well-done mirror wall immediately sets a tone—you care about design, you’re thoughtful about your space, you have your act together (even if you really don’t).
Entryway-specific tips:
- Include one full-length mirror at a usable height for last-minute outfit checks
- Consider a small ledge or hooks below for functional elements
- Keep it symmetrical for a more formal feel
- Add a plant or small bench to soften the look
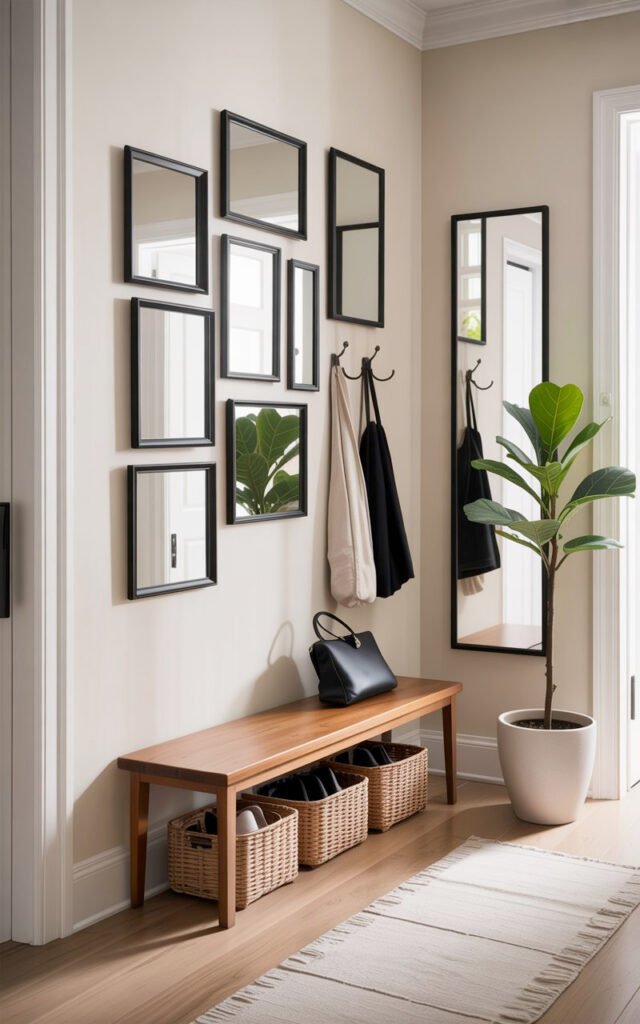
My entryway mirror wall gets more compliments than literally anything else in my house, and it cost me $89 total. People assume I hired someone or bought some expensive designer piece. Nope, just IKEA and a free Saturday afternoon.
Maintenance And Keeping It Clean
Real talk: mirrors get dirty. Dust, fingerprints, smudges—it’s annoying but manageable.
I keep a microfiber cloth and glass cleaner in my hallway closet. Quick wipe-down once a week keeps them looking good. If you have kids or pets, maybe twice a week.
FYI, those fancy mirror cleaners aren’t necessary. Basic glass cleaner works fine, or even just water and vinegar if you’re going the natural route.
The black frames also show dust, but a quick dusting with a dry cloth handles that. This is maybe five minutes of maintenance weekly—totally worth it for how much impact the mirrors have.
When Renters Can Do This Too
Renting doesn’t mean you can’t have a mirror wall. You just need to be strategic about installation.
Command strips make mirror-hanging versions for lighter mirrors. The weight limits are clearly marked—follow them. I’ve used these successfully with the lightweight LOTS mirrors.
For heavier mirrors, small nail holes are usually considered normal wear and tear by most landlords. Just fill them with spackle when you move out. Takes five minutes and costs about $3 for a spackle container that’ll last years.
Check your lease, but most allow reasonable picture hanging. A mirror wall isn’t any different than hanging multiple picture frames.
Beyond Hallways: Other Places This Works
Once you see how good a mirror wall looks, you’ll want them everywhere. And honestly? They work in lots of spaces.
Where else I’ve done this:
- Behind a desk in a home office (makes the space feel less cramped)
- In a small dining room (reflects light from a chandelier beautifully)
- Flanking a window (amplifies natural light like crazy)
- In a bedroom (creates dimension without requiring floor space)
The hallway is just the most dramatic transformation because hallways are usually such dead zones. But the technique works anywhere you want more light, more visual interest, or the illusion of more space.
DIY Confidence Building
If you’re nervous about this project, start small. Get three matching mirrors and do a simple row. See how you feel. Add more if you love it.
I’m not naturally handy. I once put furniture together backward and didn’t notice until I’d finished the whole thing (don’t ask). But this project? Actually doable for someone like me.
The worst that happens is you make some nail holes you have to fill later. That’s it. No major construction, no permanent changes, no expensive mistakes.
The Final Look
Here’s what I love about IKEA mirror walls—they punch way above their weight class in terms of style impact versus cost and effort.
For under $100 and an afternoon of work, you can completely transform one of the most overlooked spaces in your home. Your dark, boring hallway becomes this bright, interesting transition space that actually adds value to your home’s overall vibe.
Plus, the practical benefits are real. I can check how my outfit looks before leaving. The space feels bigger. Light reaches corners that used to be dim. And honestly, every time I walk past it, I feel a little satisfied that I made something this nice happen.
Whether you go with a perfect grid of matching mirrors or a collected asymmetrical arrangement, whether you spend $50 or $200, the concept works. Just plan carefully, install thoughtfully, and let those IKEA mirrors do their magic.
Now go measure your hallway and make a IKEA run. Your boring hallway is about to have a serious glow-up. 🙂