I’ll be honest: when I first moved into my house, I avoided my narrow hallway like it was cursed. It felt like a tunnel—long, boring, and just… there. Every time I walked through it, I thought “this is such wasted space.” I tried ignoring it, but you can’t ignore a hallway you walk through ten times a day.
Then I discovered that narrow hallway decorating isn’t about fighting the proportions—it’s about embracing them and using smart design to make them work FOR you, not against you. My hallway went from “I wish this didn’t exist” to “this is actually one of my favorite spaces.”
If you’re dealing with a long, narrow hallway that feels like a neglected afterthought, these narrow hallway ideas will help you transform it into a beautiful, functional space that you’re actually proud to show off.
Understanding the Long Narrow Hallway Challenge
Before we start throwing solutions at the problem, let’s talk about why long narrow hallway spaces are so tricky to design.
The Common Problems
Feels like a tunnel: Long, narrow proportions naturally create a bowling alley effect.
Limited natural light: Many hallways have no windows, making them feel dark and closed-in.
Awkward proportions: Too narrow for furniture, too long for simple wall art solutions.
High traffic: People walk through constantly, so it needs to be functional, not just pretty.
Echoes and feels cold: Hard surfaces and narrow dimensions can create acoustic issues.
Wasted potential: Often treated as “just a hallway” rather than usable space.
The Design Goals
Make it feel wider: Visual tricks that counteract the narrow proportions.
Draw attention away from length: Break up the tunnel effect.
Add warmth and character: Transform it from utilitarian to intentional.
Keep it functional: Can’t block traffic flow or make it impractical.
Maximize every inch: Use walls, ceiling, and any alcoves effectively.
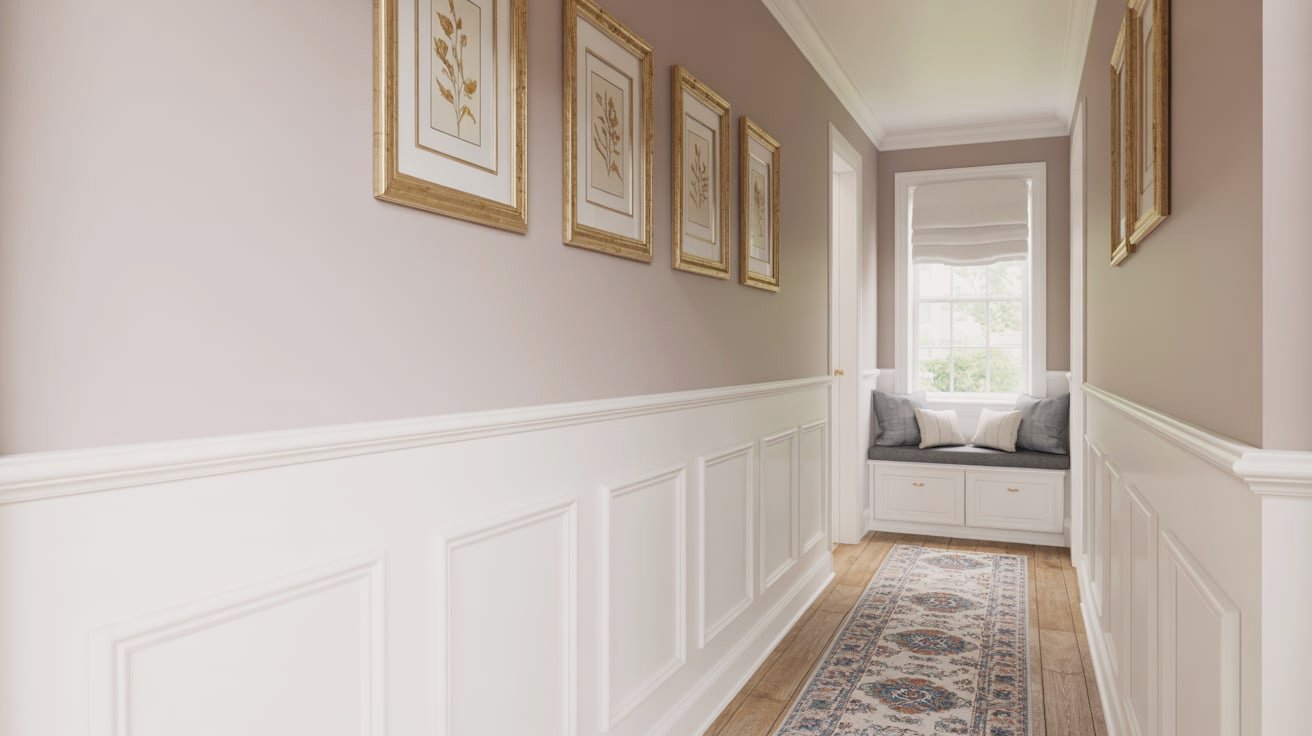
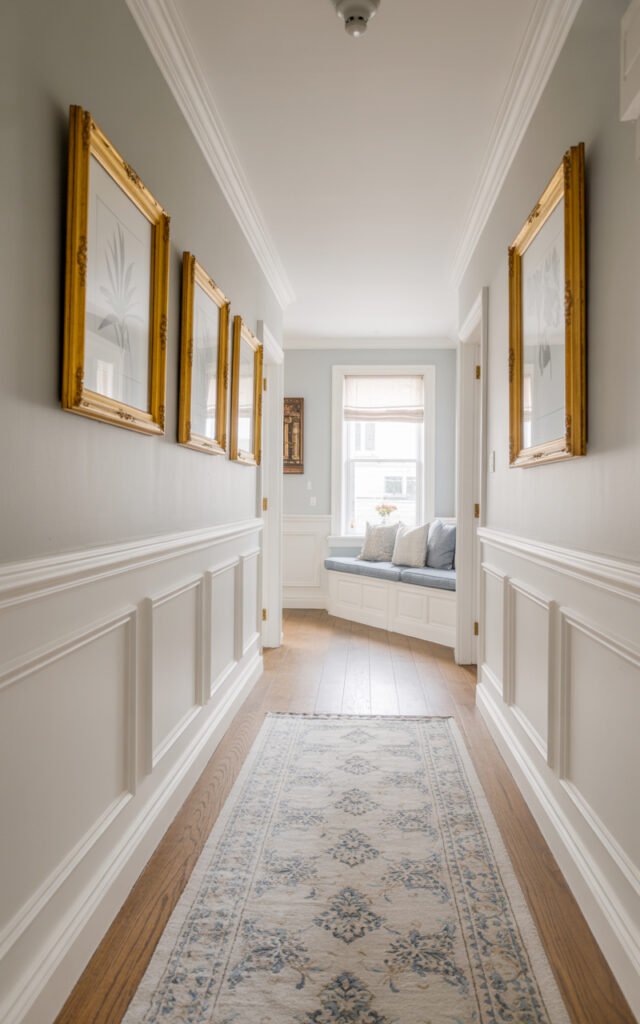
The good news? The inspiration image shows that narrow hallways can actually become elegant, beautiful spaces with the right approach.
Wainscoting: Your Secret Weapon
The white wainscoting in the inspiration image is doing serious design work. This is one of the best hallway designs solutions for narrow spaces.
Why Wainscoting Works in Narrow Hallways
Adds architectural interest: Creates dimension on flat walls.
Breaks up wall height: Divides the visual space horizontally, making it feel wider.
Protects walls: Practical in high-traffic areas where walls get bumped and scuffed.
Adds elegance: Instantly makes spaces feel more finished and intentional.
Creates a visual endpoint: Gives the eye a place to rest at a specific height.
Works in any style: Traditional, transitional, modern farmhouse—all work with wainscoting.
Types of Wainscoting for Hallways
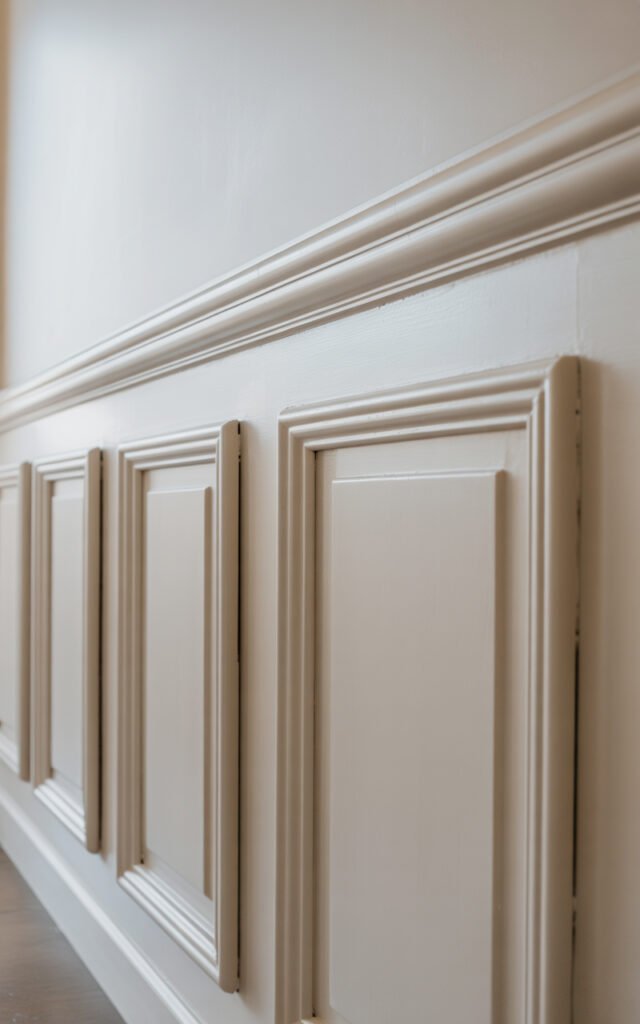
Raised panel (like the inspo):
- Traditional, classic look
- Individual panels with raised centers
- Most formal and elegant
- Takes more effort to install but highest impact
Flat panel:
- Simpler version of raised panel
- Flat rectangles created with trim
- Easier DIY project
- Still creates architectural interest
Board and batten:
- Vertical boards with battens between
- More casual, farmhouse vibe
- Very trendy right now
- Good DIY option
Beadboard:
- Vertical grooved panels
- Cottage or coastal feel
- Can buy in sheets for easier install
- More casual than raised panel
Picture frame molding:
- Simple frames created with trim
- Most minimal look
- Contemporary option
- Affordable and DIY-friendly
Wainscoting Height and Proportions
Standard height: 32-36 inches from floor (like the inspo)
Why this works:
- Roughly 1/3 of wall height in standard 8-foot ceilings
- Creates pleasing proportions
- Practical height for wall protection
In higher ceilings:
- Can go up to 48 inches
- Or stick with 36″ to emphasize ceiling height
Chair rail on top:
- Finishes the wainscoting edge
- Adds definition
- Can be simple or decorative

I installed flat-panel wainscoting in my 42-inch wide hallway using pre-primed MDF boards and trim. Painted everything white. Cost about $300 in materials and took a weekend. The difference was immediate—my boring hallway suddenly had character and elegance.
DIY Wainscoting Tips
Measure carefully: Plan your panel spacing so it’s even and symmetrical.
Use level and straight edge: Crooked wainscoting is very noticeable.
Pre-paint components: Easier than painting after installation.
Caulk seams: Makes everything look built-in and seamless.
Don’t rush: This is visible and permanent—take your time.
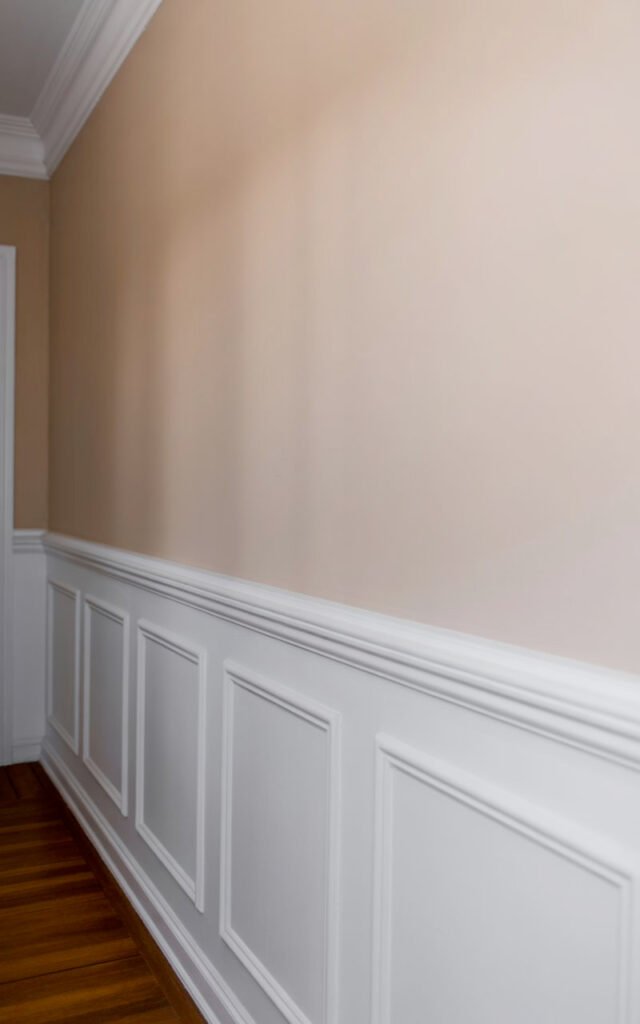
Two-Tone Wall Treatment: Visual Width Trick
Notice how the inspiration image has two distinct colors—white wainscoting below and soft greige above? This is a crucial narrow hallway decorating technique.
Why Two-Tone Walls Help
Creates horizontal visual break: Stops the eye from just racing down the length.
Makes walls feel wider: Horizontal division > vertical emphasis.
Adds depth and interest: More dynamic than solid color.
Defines the space: Creates intentionality and design cohesion.
Allows for color without overwhelming: Upper wall can have color while keeping lower portion neutral.
Color Combinations That Work
White wainscoting + soft neutral above (like the inspo):
- White, cream, or off-white below
- Soft greige, warm beige, or pale gray above
- Classic, timeless, makes space feel larger
White wainscoting + bolder color above:
- Navy, forest green, or charcoal above
- Creates drama while white keeps it from feeling closed-in
- Modern, bold
Painted wainscoting + lighter walls:
- Soft gray wainscoting with white above
- Or navy below with cream above
- Adds interest while maintaining light
Monochromatic:
- Two shades of same color family
- Most subtle, very elegant
- Good if you want minimal contrast
Paint Selection Tips
Upper wall color:
- Should be light to medium tone in narrow hallways
- Warm neutrals work best (beiges, warm grays, soft greiges)
- Test samples at different times of day
- Remember: no natural light = colors look different
Wainscoting color:
- White or off-white is safest and most classic
- Can match your trim color
- Slightly lighter than upper wall if going monochromatic
Finish:
- Wainscoting: Semi-gloss or satin (wipeable, durable)
- Upper walls: Eggshell or satin (some sheen helps reflect light)
The inspiration image uses what looks like white wainscoting with a soft warm greige above—absolutely perfect for making a narrow hallway feel spacious and elegant.
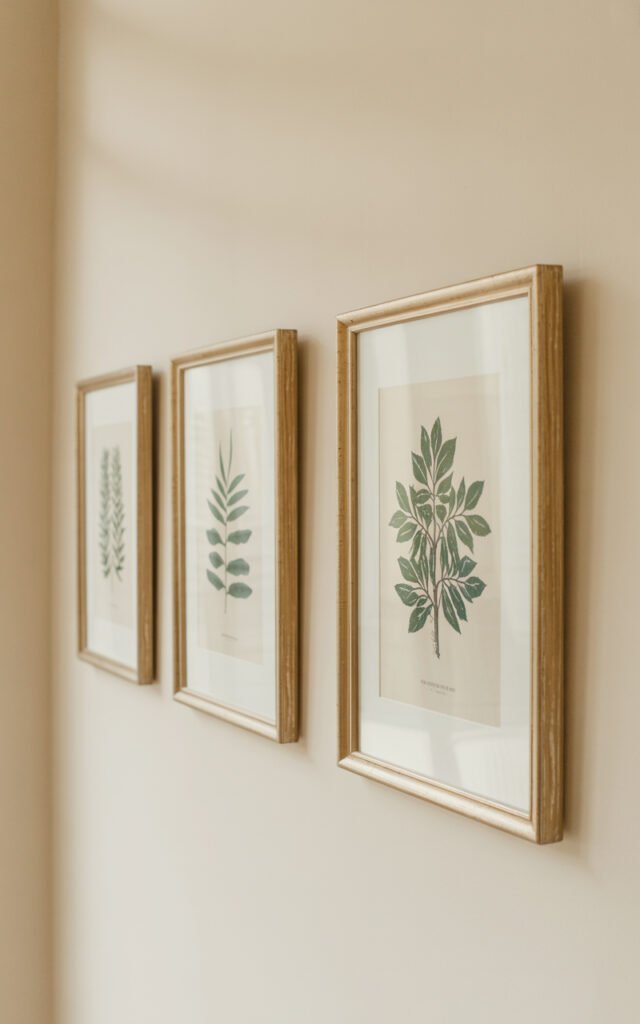
Gallery Wall Strategy for Long Hallways
Those three botanical prints in the inspiration image? Perfectly executed hallway inspiration for art placement.
Why Gallery Walls Work in Narrow Hallways
Fill long expanses: Lots of wall space to work with.
Create visual interest: Breaks up monotony of long walls.
Draw eye along: Gives you something to look at while walking through.
Add personality: Showcase your style and interests.
Work at any budget: Frame prints, photos, or original art at various price points.
Gallery Wall Layouts for Narrow Hallways
Linear/grid layout (like the inspo):
- Frames aligned in a straight row or grid
- Most formal and clean
- Works best in narrow hallways (doesn’t add visual width)
- Easier to execute evenly
Salon-style:
- Various sizes arranged organically
- More casual and collected
- Can work but needs to be carefully balanced
- Risk of making narrow space feel busier
Symmetrical pairs:
- Two frames on each side at same height
- Creates balance
- Very traditional
- Good for shorter hallway sections
Ascending/descending:
- Frames get progressively larger or smaller
- Creates movement
- Draws eye along hallway
- More dynamic
Art Selection for Cohesive Look
Matching frames (like the inspo):
- All the same color and style
- Creates unity and calm
- Easier on the eye
- Best for narrow spaces
- The inspo uses matching light wood frames
Similar subject matter:
- Botanical prints (like the inspo)
- Black and white photography
- Abstract art in same palette
- Family photos
- Creates theme and cohesion
Consistent matting:
- White or cream mats (like the inspo)
- All the same size mat border
- Professional, gallery-like
Size considerations:
- Not too large (overwhelms narrow space)
- Not too small (gets lost)
- The inspo frames look like 16×20 or 18×24—good size
Hanging Tips for Long Hallways
Height:
- Center of artwork at 57-60 inches from floor
- This is standard gallery height
- Eye-level when walking
Spacing:
- 2-4 inches between frames in a gallery wall
- More space (6-12 inches) if doing linear row
- Keep consistent for clean look
Measure and mark:
- Use painter’s tape to map layout on wall first
- Ensures even spacing before you commit
- Check level multiple times
Lighting:
- Picture lights if you want drama
- Or ensure good hallway lighting that illuminates art
I created a linear gallery wall with 5 botanical prints in matching gold frames down my hallway. Spent about $200 total (frames from Michaels with coupons, prints printed locally). Made my boring hallway feel like a curated gallery space.
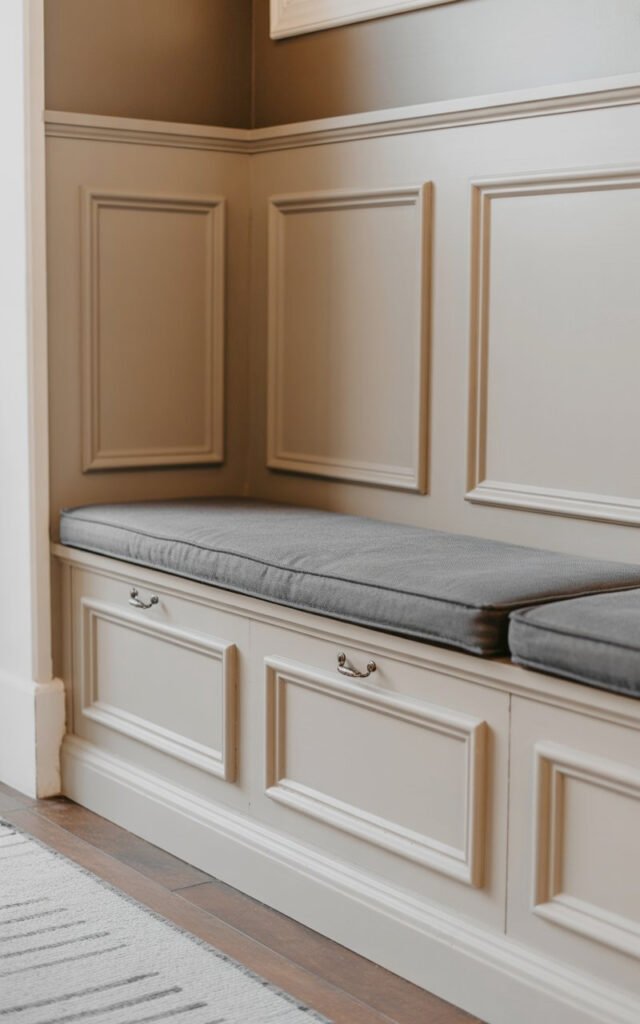
Built-In Seating: Functional Use of Space
The built-in bench in the inspiration image is brilliant—it adds function without taking up width. This is smart hallway design thinking.
Why Built-In Benches Work
Utilize dead space: Corners or alcoves become functional.
Don’t stick out: Built into wall, so doesn’t narrow the walkway.
Add seating: Practical for putting on shoes, resting, phone calls.
Create storage: Lift-top or drawers underneath.
Architectural element: Adds custom, intentional feel.
Defines zones: Breaks up long hallway into sections.
When and Where to Add Benches
At hallway ends:
- If your hallway ends in a wall
- Creates destination instead of dead-end
In alcoves or wider sections:
- If hallway widens at any point
- Tuck bench into wider area
Near doorways:
- Outside bedroom or bathroom
- Practical spot for waiting or transitioning
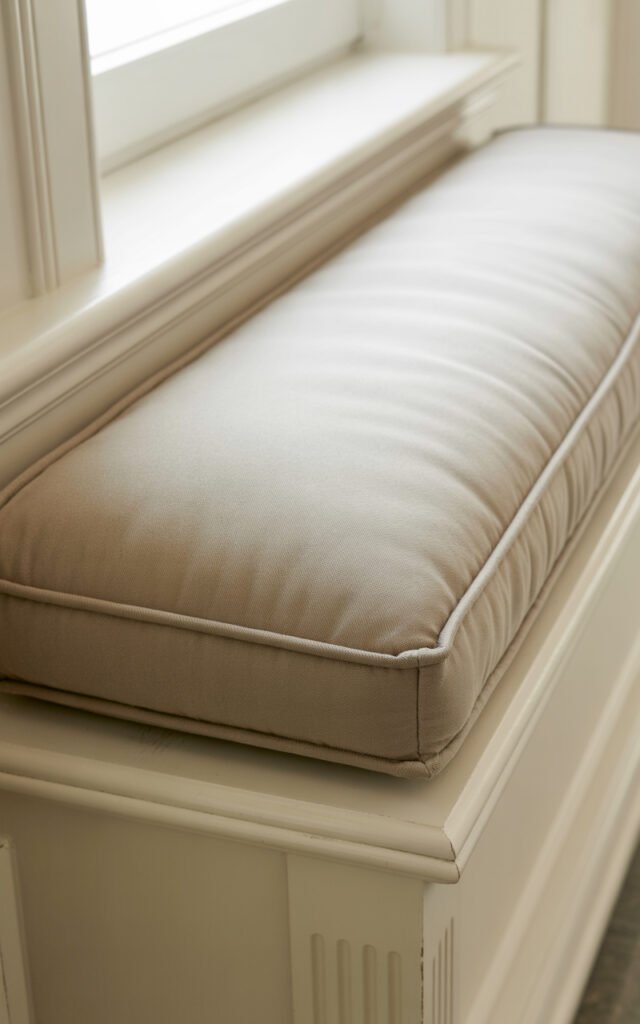
Window seats:
- If you have a window in your hallway (lucky!)
- Makes most of natural light
Bench Design Considerations
Depth:
- 15-18 inches deep typical
- Enough to sit comfortably
- Not so deep it narrows hallway
Height:
- 18 inches high for seating
- Built into wainscoting for cohesive look
Storage options:
- Lift-top for blankets, shoes
- Drawers for more organized storage
- Open cubbies below
Cushioning (like the inspo):
- Upholstered top for comfort
- Neutral fabric that’s durable
- Can add throw pillows (but keep minimal)
Style:
- Match wainscoting if you have it
- Painted white for classic look (like inspo)
- Natural wood for warmth
The inspiration image shows a beautiful built-in bench with upholstered cushions integrated into the wainscoting—elegant and functional.
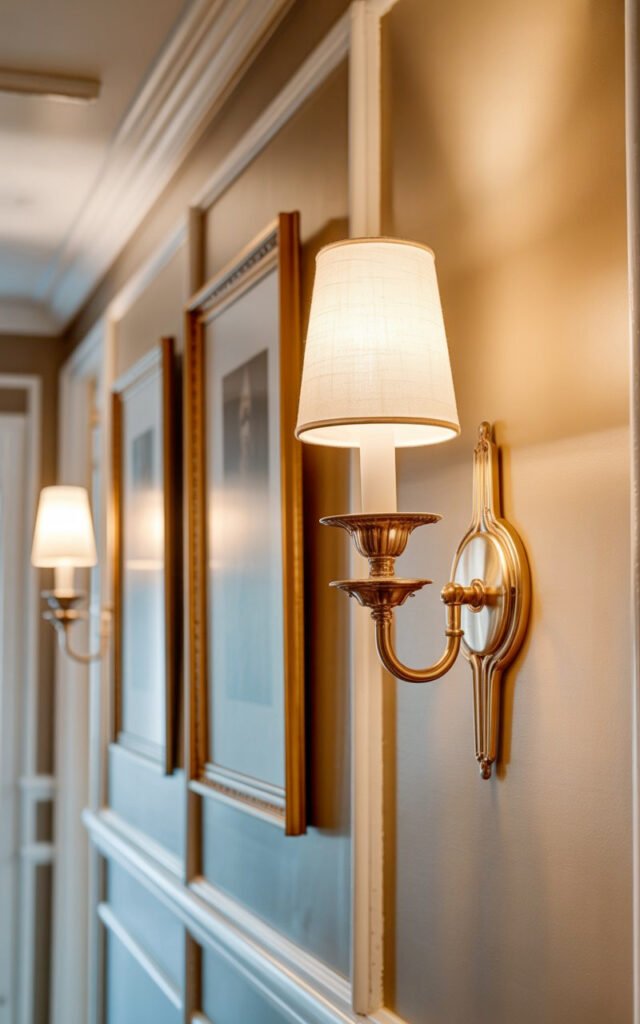
Lighting: The Game-Changer for Dark Hallways
Good lighting can make or break a narrow hallway. Many hallways have no natural light, so artificial lighting becomes critical.
The Three-Layer Lighting Approach
Ambient/overhead:
- Provides general illumination
- Flush-mount or recessed fixtures
- Every 6-8 feet in long hallways
Accent/wall:
- Sconces to add dimension
- Picture lights for art
- Creates visual interest and shadows
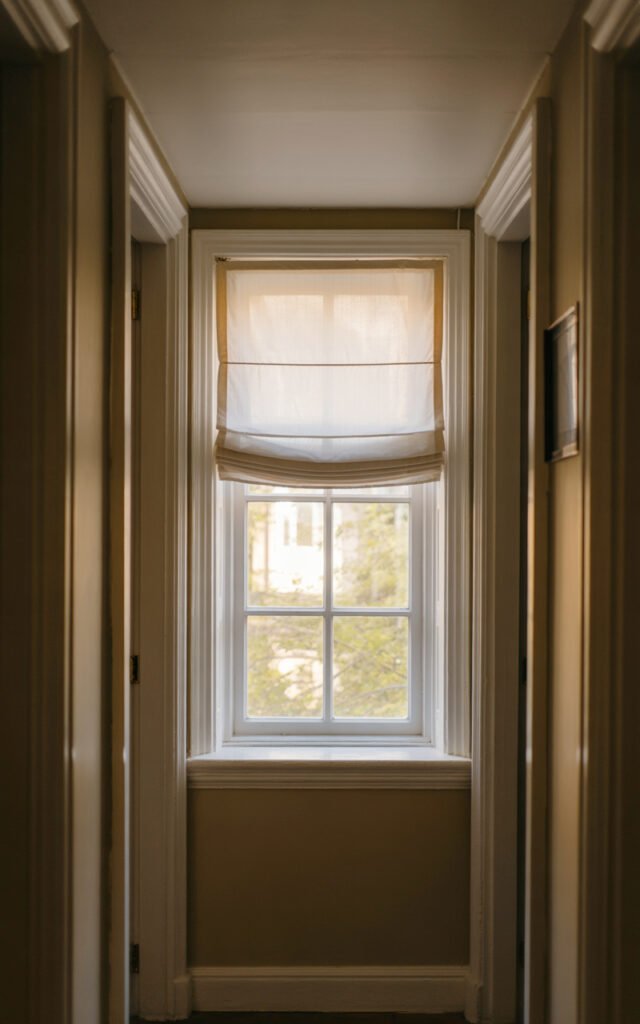
Natural light (if available):
- Window at end of hallway (like inspo)
- Glass doors letting light in
- Maximize any natural light you have
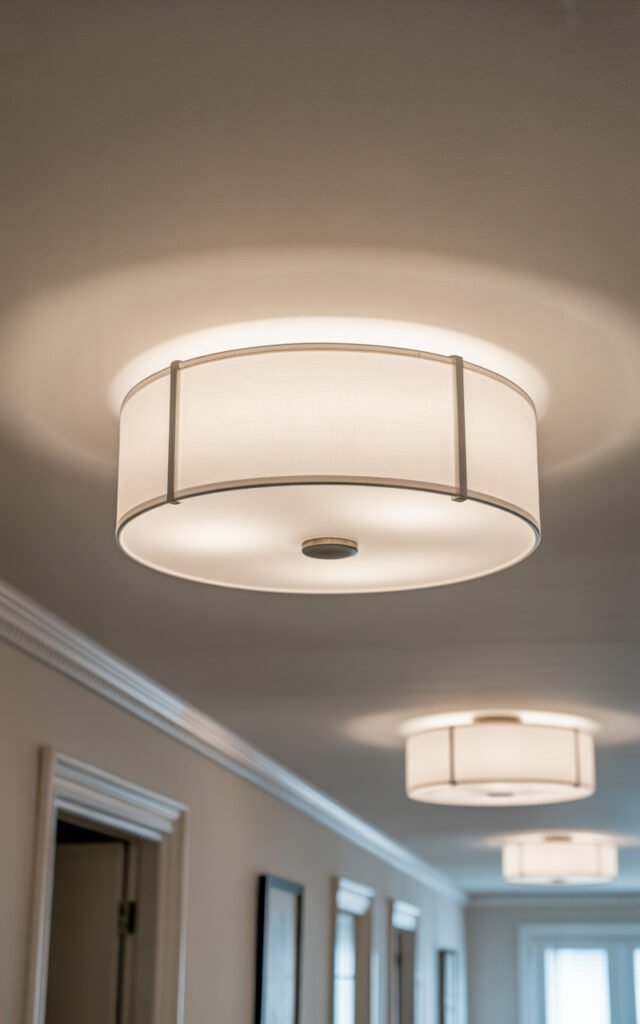
Best Fixtures for Narrow Hallways
Flush-mount ceiling lights:
- Don’t hang down (critical in narrow spaces)
- Spaced evenly down hallway
- Modern or traditional styles available
Recessed lighting:
- Most invisible option
- Provides even, clean light
- Professional installation needed
Wall sconces:
- Add architectural interest
- Create ambient glow
- Mount at 60-66 inches high
- Space 6-8 feet apart
Picture lights:
- If you have gallery wall
- Adds gallery feel
- Can be battery-operated
Natural light sources:
- Window at hallway end (like inspo)
- Skylight if possible
- Glass doors
Color Temperature and Brightness
Warm white (2700-3000K):
- Essential for residential
- Creates welcoming glow
- Never cool white in hallways
Brightness:
- 100-150 lumens per square foot
- Brighter than you think
- Hallways need good light for safety
Dimmers:
- Allow adjustment for time of day
- Can go bright for function, dim for ambiance
The inspiration image shows beautiful natural light from the window at the end, plus appears to have good overhead lighting. This combination prevents the tunnel effect.
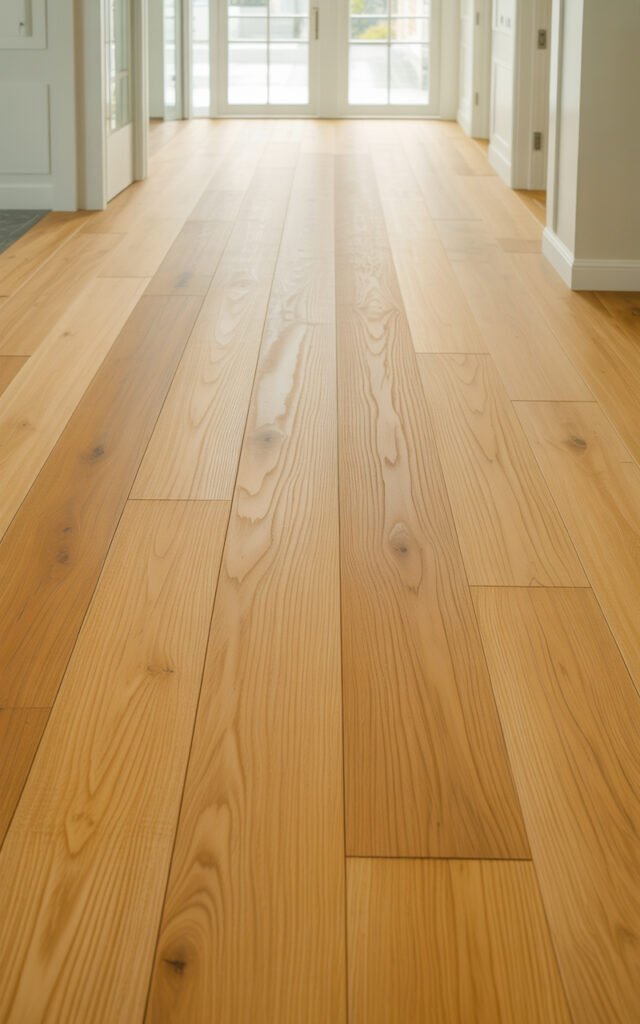
Flooring That Elongates vs. Widens
Your flooring choice affects how narrow your hallway feels. The light wood in the inspiration image is a good choice.
Best Flooring for Narrow Hallways
Light wood (like the inspo):
- Oak, ash, maple in natural or light stain
- Reflects light
- Makes space feel more open
- Wide planks (5-7 inches) better than narrow
Luxury vinyl plank (LVP):
- Looks like wood
- More budget-friendly
- Waterproof and durable
- Wide planks available
Light tile or stone:
- Cream, beige, light gray
- Large format (minimize grout lines)
- Durable and elegant
Neutral carpet:
- Softens sound (helpful in echoing hallways)
- Warm underfoot
- Can show wear in high traffic
Plank Direction Matters
Parallel to hallway (running lengthwise):
- Emphasizes length (can make it feel longer/narrower)
- Traditional installation
- Fewer seams
Perpendicular to hallway (running width-wise):
- Makes hallway feel wider
- More seams and waste
- Can visually shorten long hallways
Diagonal:
- Creates visual interest
- Makes space feel larger
- More complex installation
For very narrow hallways, consider perpendicular to create illusion of width. For moderately narrow, parallel is fine.
Runner Rug Considerations
That patterned runner in the inspo:
- Adds softness and pattern
- Defines the path
- Protects flooring
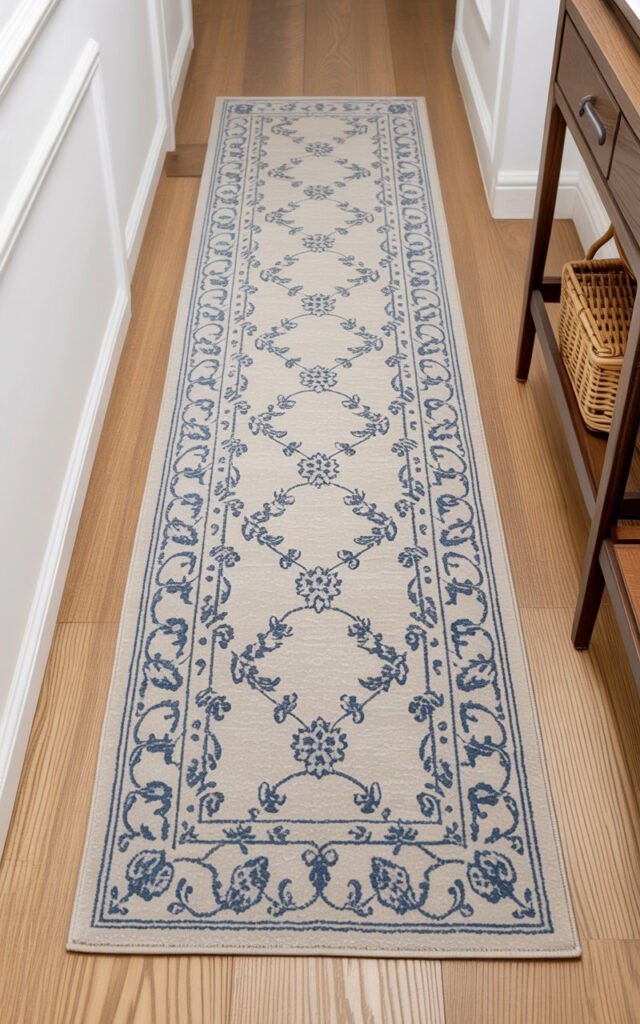
Size:
- Should run most of hallway length
- Leave 3-4 inches of floor on each side
- Standard widths 2’3″ to 2’6″
Pattern and color:
- Light background with blue/neutral pattern (like inspo)
- Not too dark (makes space feel smaller)
- Pattern adds interest without shrinking space
Material:
- Wool for durability and softness
- Flatweave for low profile (doors clear easier)
- Non-slip pad essential
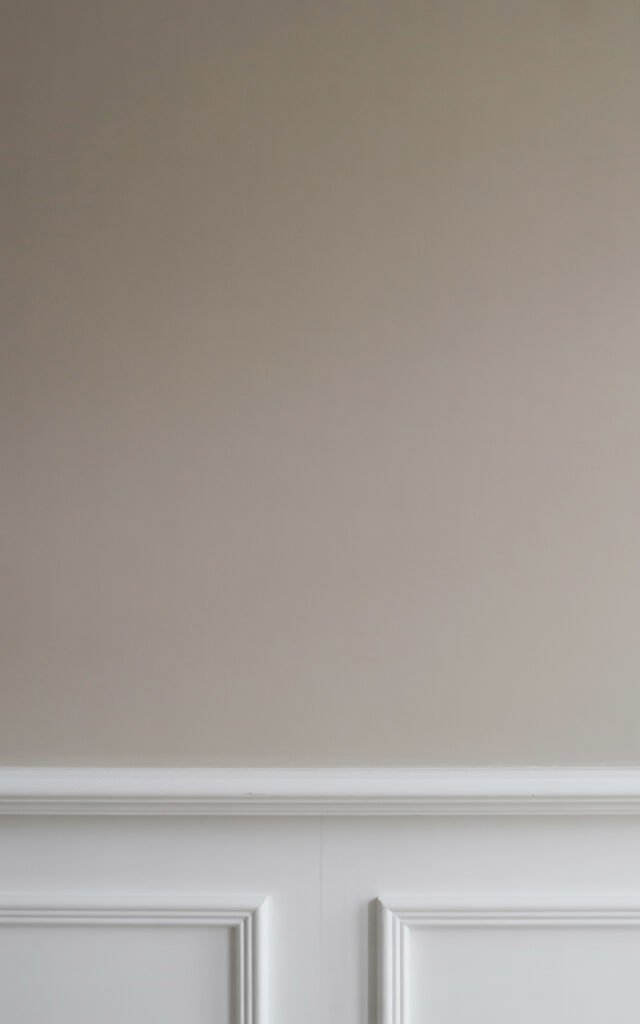
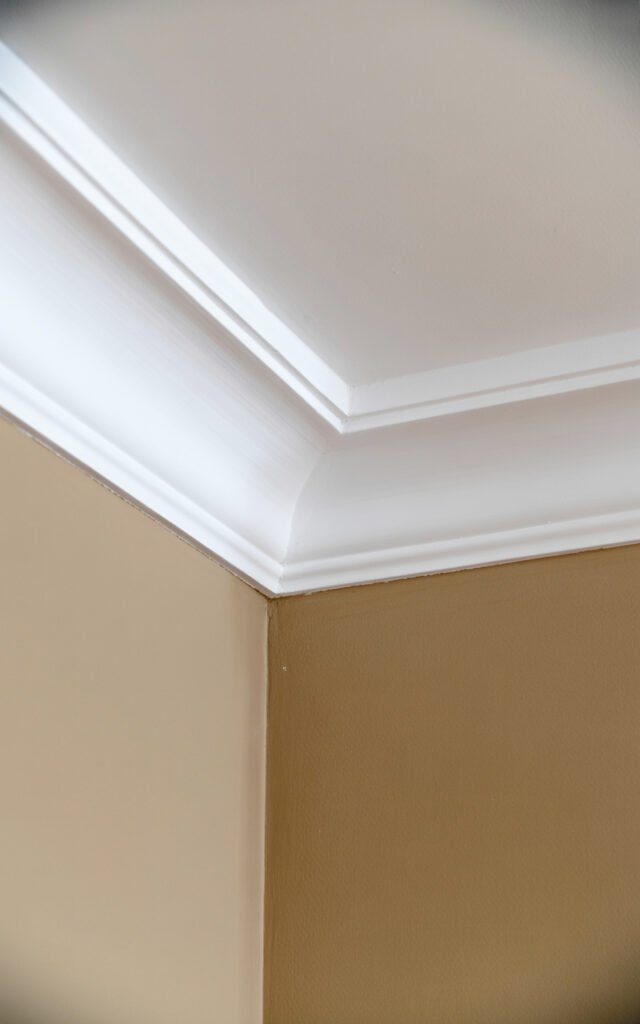
Crown Molding and Ceiling Treatment
The white ceiling and crisp crown molding in the inspiration image complete the elegant look.
Why Crown Molding Matters
Finishes the room: Creates polished, intentional look.
Adds architecture: Gives character to plain spaces.
Draws eye up: Makes ceiling feel higher.
Creates cohesion: Connects walls and ceiling visually.
Hides imperfections: Where wall meets ceiling often isn’t perfect.
Ceiling Color Strategy
Paint ceiling same as walls:
- Eliminates boundaries
- Makes space feel larger
- Good for very narrow hallways
Paint ceiling white (like inspo):
- Classic, traditional
- Creates contrast with wall color
- Makes ceiling feel higher
- Safe choice that always works
Paint ceiling slightly lighter:
- Than wall color
- Subtle but effective
- Creates sense of height
In narrow hallways, white ceiling (like the inspo) is usually best choice—keeps it feeling open and bright.
Storage Solutions That Don’t Narrow the Space
The built-in bench with storage in the inspiration image shows smart thinking. Here are more options:
Wall-Mounted Storage
Floating shelves:
- Very narrow (6-8 inches deep)
- For keys, mail, small items
- Don’t obstruct walkway
Wall hooks:
- Coats, bags, keys
- Minimal projection
- Keep to 3-4 inches deep hooks
Slim console:
- If you have a slightly wider section
- Maximum 10-12 inches deep
- Legs keep it light
Built-In Options
Recessed niches:
- Built into wall cavities between studs
- Zero projection into hallway
- Perfect for small items
Built-in cabinets:
- Floor-to-ceiling at hallway end
- Uses vertical space
- Custom look
Under-bench storage:
- Like the inspo bench
- Lift-top or drawers
- Practical and hidden
Common Narrow Hallway Mistakes
Don’t make these errors I learned the hard way:
Mistake #1: Dark Paint Colors
Dark walls make narrow hallways feel like caves. Stick with light neutrals.
Mistake #2: Oversized Art or Decor
Large pieces overwhelm narrow spaces. Keep art proportional to wall size.
Mistake #3: Furniture Sticking Out
Regular consoles or tables narrow walkways. Only use slim wall-mounted or built-in options.
Mistake #4: Clutter on Walls
Too many items creates visual chaos. Curate carefully—less is more.
Mistake #5: Poor Lighting
One dim overhead light makes hallways feel depressing. Layer multiple light sources.
Mistake #6: No Floor Protection
High traffic wears flooring. Use runner rug to protect and add style.
Mistake #7: Ignoring Proportions
Trying to make hallway something it’s not instead of embracing the space.
Budget Breakdown: Hallway Makeover ($800)
Paint (walls, wainscoting, ceiling): $100
- Quality paint for 12-foot hallway
Wainscoting materials (DIY): $300
- MDF boards, trim, chair rail
Three framed botanical prints: $150
- Frames + prints
Runner rug: $120
- 2.5×12 foot runner
Lighting upgrade: $80
- New flush-mount fixture or two sconces
Crown molding (DIY): $50
- Materials for 12-foot hallway
Total: ~$800
If you’re doing built-in bench, add $200-500 depending on DIY vs. custom.
Quick Wins for Immediate Impact
If you can only do a few things:
Top 3 Changes
- Paint: Light neutral walls + white wainscoting/trim (biggest impact, $100)
- Gallery wall: 3-5 framed prints in matching frames ($100-150)
- Runner rug: Adds warmth and pattern ($100-150)
These three alone transform a hallway from boring to beautiful.
Small vs. Wide Narrow Hallways
If your hallway is 36-42 inches wide:
- Focus on walls (art, wainscoting)
- Skip any furniture
- Wall-mounted everything
- Light colors essential
If your hallway is 42-48 inches wide:
- Can add slim bench if desired
- Maybe small floating shelf
- More flexibility
If your hallway is 48+ inches wide:
- Can incorporate more furniture
- Small console possible
- More design options
Maintaining Your Hallway
Keep it looking fresh:
Weekly
- Vacuum or sweep floor and rug
- Quick dust of artwork and surfaces
- Wipe down high-touch areas
Monthly
- Dust crown molding and trim
- Clean walls (especially near wainscoting top)
- Vacuum runner rug thoroughly
- Touch up paint scuffs
Seasonally
- Deep clean floors
- Wash or professionally clean runner
- Check art hanging (ensure secure)
- Refresh any decor
Final Thoughts: Your Hallway, Transformed
A narrow hallway doesn’t have to be a design problem—it’s an opportunity to create something elegant, functional, and beautiful. The inspiration image proves it: wainscoting for architectural interest, two-tone paint for visual width, thoughtful art arrangement, smart built-in seating, good lighting, and pretty flooring with a runner.
None of these elements are outrageously expensive or require professional help (though some make it easier). The key is understanding the proportions you’re working with and making intentional choices that enhance rather than fight them.
Start with paint and wainscoting—these two changes alone will dramatically upgrade your hallway. Add art in matching frames. Ensure good lighting. Layer in a runner rug. Maybe add a bench if you have space. Each element builds on the others to create a cohesive, beautiful corridor.
My narrow hallway went from “I wish this didn’t exist” to my favorite design feature in my house. Every design choice was strategic, intentional, and budget-conscious. Total investment: about $700 over two months.
Your narrow hallway is waiting for you to see its potential. Embrace the proportions, use these design strategies, and create a space that makes you smile every time you walk through it. Because you deserve a home where even the hallways are beautiful. 🙂