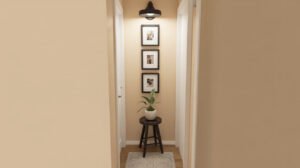
Let me tell you about the moment I realized hallways could actually be cool. I was scrolling through home tours and saw a narrow corridor with this gorgeous vertical wood slat wall. It stopped me mid-scroll. My hallway was the same boring white box everyone has, and here was proof it could be… architectural. Interesting. Actually designed.
That wood slat wall wasn’t just decoration—it was solving multiple design problems at once: adding texture, creating warmth, providing visual interest, and making a narrow space feel intentional instead of just “the way to get to the bedrooms.”
If you’re dealing with a narrow hallway that feels like a forgotten afterthought, slat wall hallway ideas might be exactly what you need. This is one of those design moves that looks expensive and custom but can actually be pretty achievable (and dare I say, DIY-able).
Let me show you how to use modern narrow hallway design—specifically slat walls—to transform your corridor from “meh” to “wait, let me show you this.”
Understanding Slat Wall Design
Before we start building, let’s talk about what slat walls are and why they’re having such a major moment in modern narrow hallway ideas.
What Are Slat Walls?
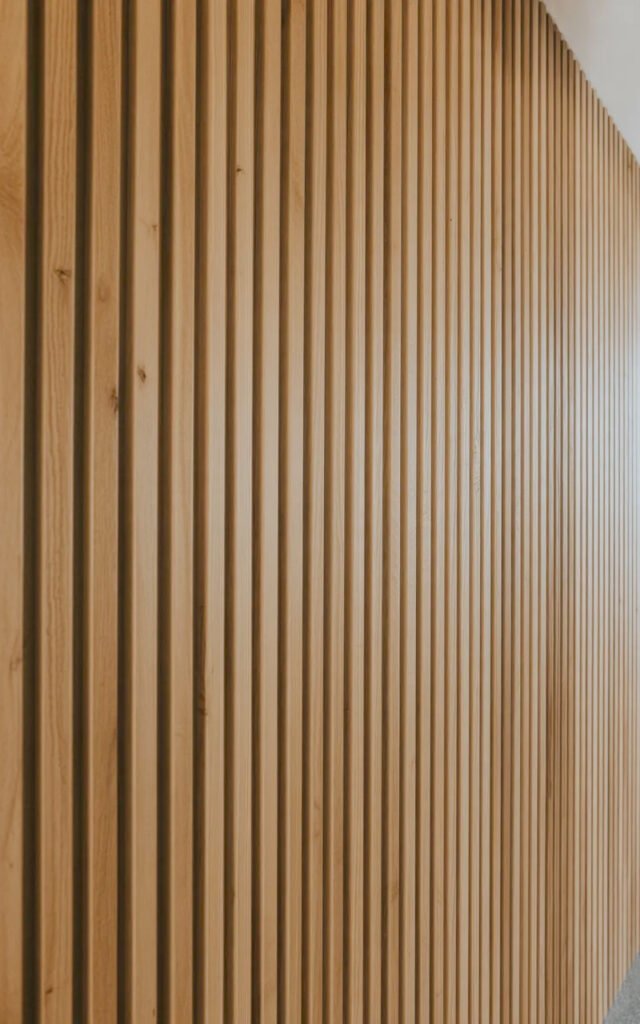
Definition: Vertical or horizontal wood strips (slats) mounted to a wall with consistent spacing between them, creating a linear pattern and dimensional texture.
Also called:
- Wood slat walls
- Batten walls
- Slatted accent walls
- Vertical slat panels
- Wood strip walls
Key characteristics:
- Linear, rhythmic pattern
- Creates shadow and depth
- Can be stained wood or painted
- Typically 1-3 inches wide slats
- ½-2 inch spacing between slats
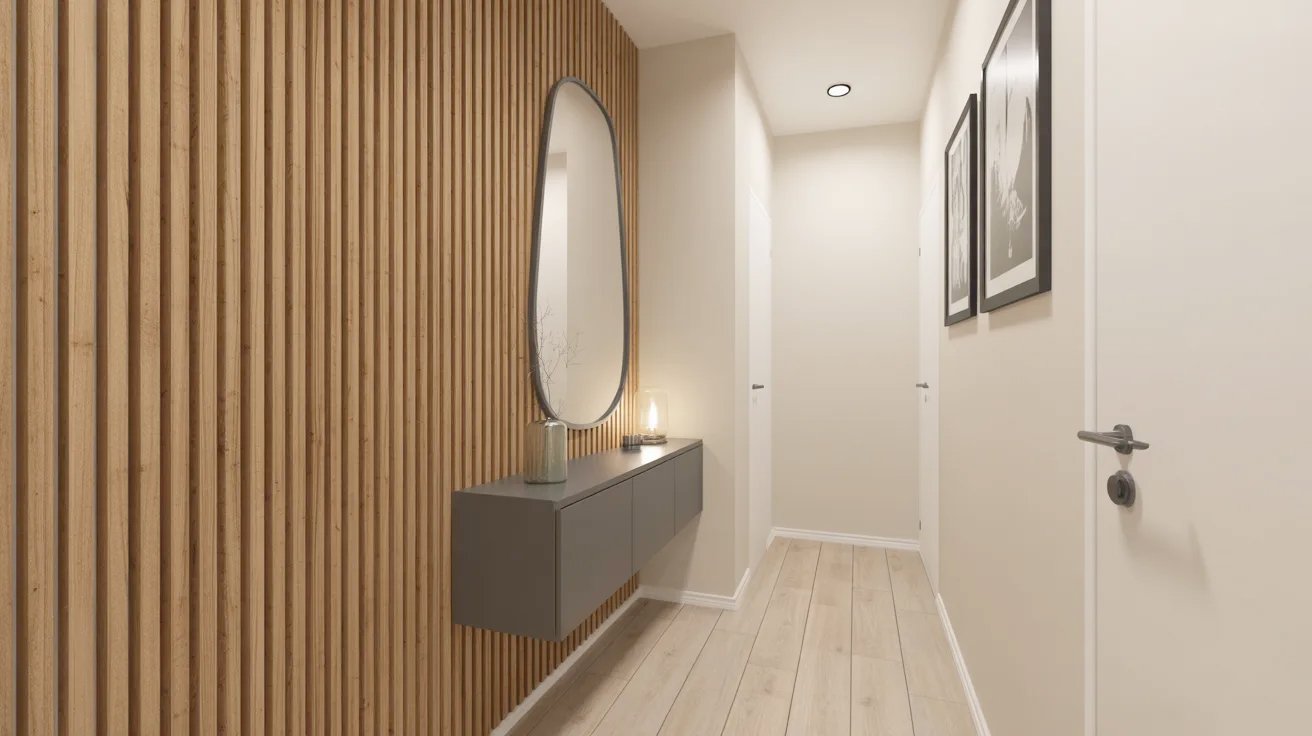
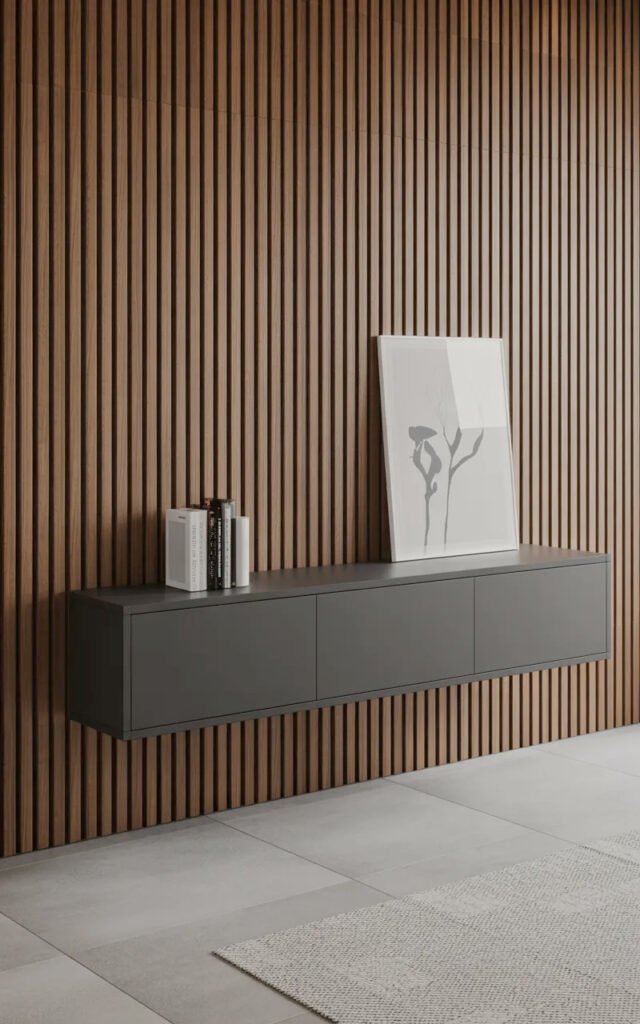
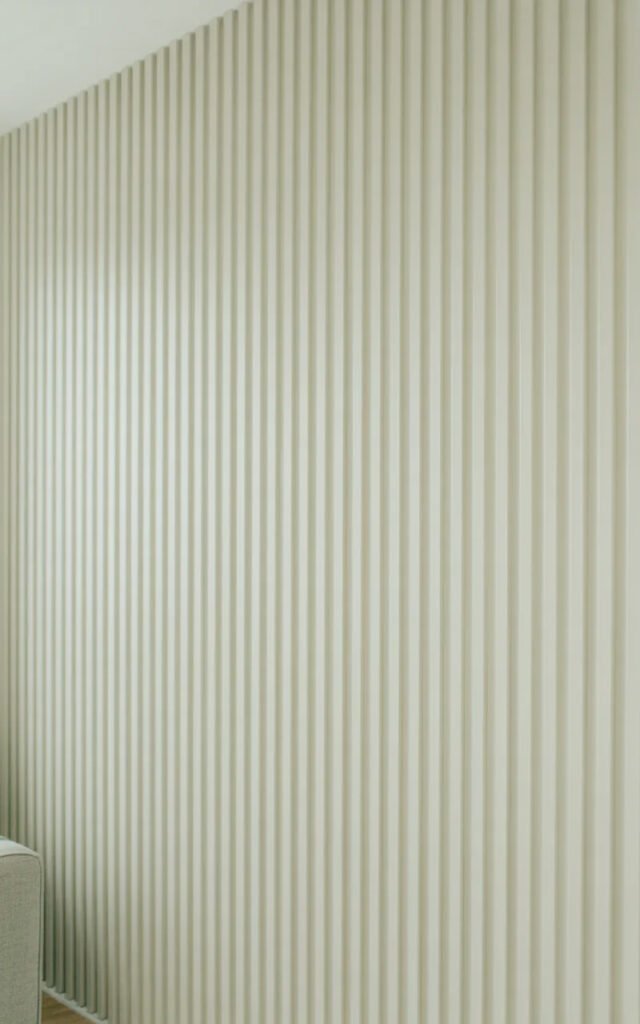
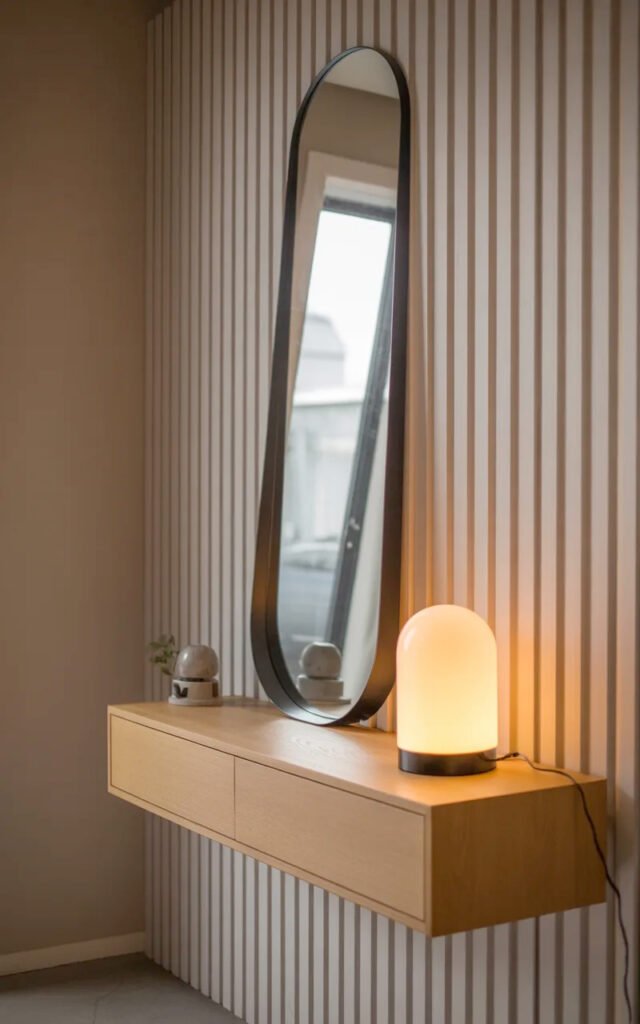
The inspiration image shows vertical slats in natural wood tone—one of the most popular approaches.
Why Slat Walls Work in Narrow Hallways
Add architectural interest: Transform plain walls into textured features.
Create visual texture: Without adding bulk or narrowing the space.
Draw the eye vertically: Vertical slats make ceilings feel higher.
Provide warmth: Wood adds natural warmth to sterile spaces.
Hide imperfections: Cover damaged walls or uneven surfaces.
Modern aesthetic: Contemporary, on-trend, elevated design.
Versatile styling: Works with various decor styles from Scandinavian to mid-century modern.
Practical benefits: Can conceal wiring, utilities, or provide backing for wall-mounted items.
Horizontal vs. Vertical Slats
Vertical slats (like the inspo):
Pros:
- Make ceiling feel higher
- Elongate the space visually
- More common and easier to execute
- Better for very narrow hallways
Cons:
- Can emphasize how narrow the space is
- More slats needed = more cutting
Horizontal slats:
Pros:
- Make hallway feel wider
- Can shorten the appearance of long hallways
- Fewer pieces to cut and install
Cons:
- Can make ceiling feel lower
- Less common aesthetic
For most narrow hallways, vertical is the better choice—exactly like the inspiration image.
Planning Your Slat Wall
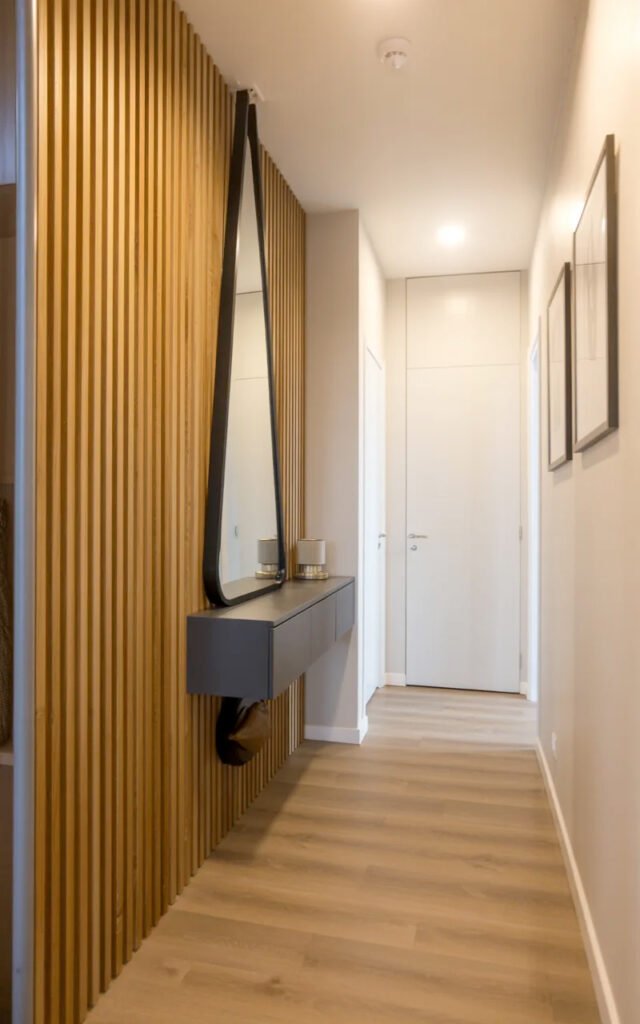
The inspiration image shows a full-height slat wall on one side. Let’s plan yours strategically.
Which Wall to Feature
One accent wall (like the inspo):
Best choice: Usually the longer wall on one side
Why it works:
- Creates focal point
- Doesn’t overwhelm narrow space
- Provides visual interest without closing in the hallway
- More affordable than doing both walls
Both walls:
When to consider:
- If hallway is wider (48+ inches)
- For dramatic, cocoon-like effect
- Higher budget and time investment
When to skip:
- Narrow hallways under 42 inches
- Limited budget
- Might feel too enclosed
Partial wall:
Lower third or half:
- More subtle approach
- Can work like wainscoting
- Less expensive
- Good for testing the look
The inspo does one full-height wall—strong impact without overwhelming the narrow space.
Slat Specifications
Slat width:
- 1-2 inches: Delicate, more slats needed
- 2-3 inches: Medium (like the inspo appears to be)
- 3-4 inches: Bolder, fewer slats needed
Spacing between slats:
- ½ inch: Tight, more solid appearance
- 1 inch: Medium (common choice)
- 1.5-2 inches: More open, shows more wall behind
Slat thickness:
- ½ inch: Minimal projection
- ¾ inch: Standard (good balance)
- 1 inch: More substantial shadow lines
Height:
- Floor to ceiling: Most dramatic (like inspo)
- From baseboard to ceiling: Slightly more practical
- Partial height: More conservative
Material Choices
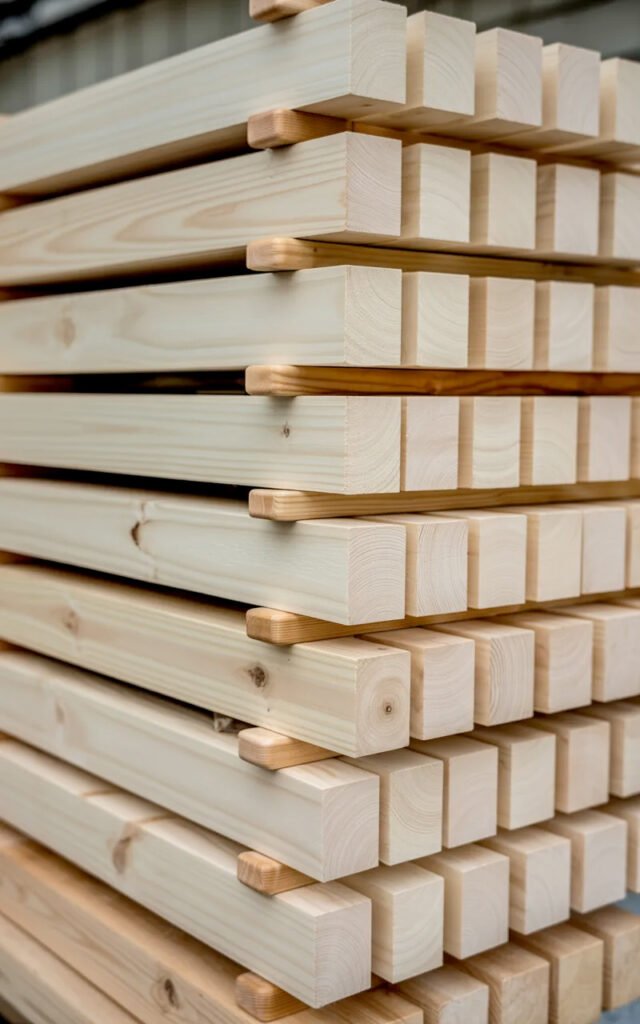
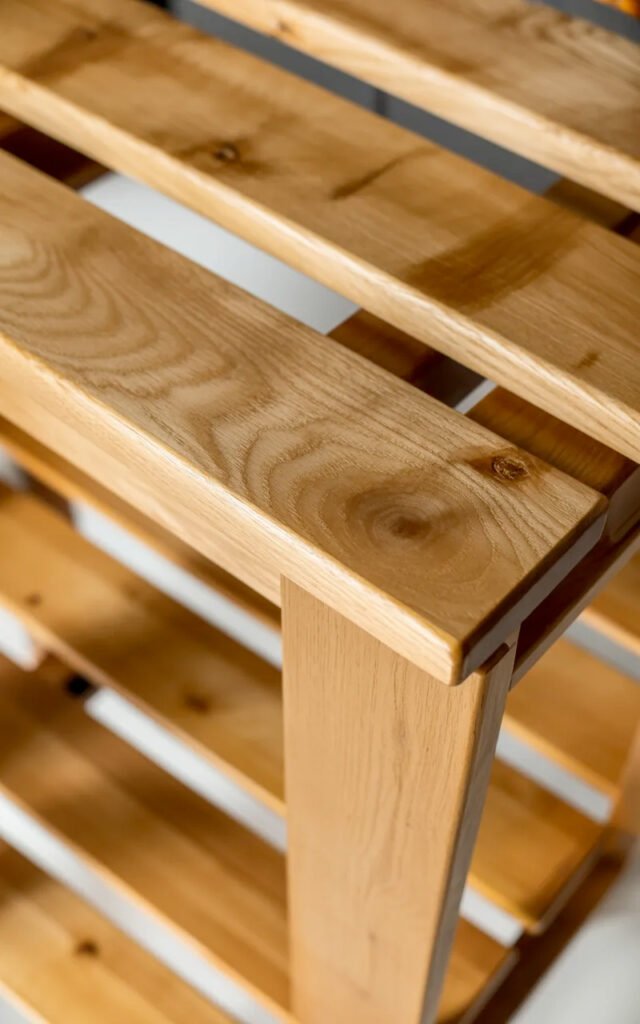
Real wood:
- Pine, poplar, or oak strips
- Most authentic look
- Can stain to any color
- More expensive
- The inspo appears to be natural wood
MDF (medium-density fiberboard):
- Smooth, paintable surface
- More affordable
- Uniform and consistent
- No wood grain (can be pro or con)
Plywood strips:
- Ripped from plywood sheets
- Budget-friendly
- Can be painted or stained
- Edges need finishing
Pre-made panels:
- Purchase ready-made slat panels
- Easiest installation
- Most expensive
- Limited customization
I used pine 1x2s ripped to 1.75 inches wide, stained in natural oak, spaced 1 inch apart. Cost about $250 in materials for my 12-foot hallway wall. Took a weekend to install.
The Floating Console Addition
Notice that dark floating cabinet in the inspiration image? This is genius hallway inspo narrow strategy—combining slat wall with functional furniture.
Why Floating Consoles Work
Zero floor footprint: Mounted to wall, doesn’t narrow walkway.
Clean, modern aesthetic: Matches slat wall contemporary vibe.
Provides storage: Essential in hallways.
Can integrate with slat wall: Slats behind create built-in look.
Hides mounting hardware: Slats conceal brackets and wiring.
Creates surface for styling: Keys, decor, lighting.
Choosing Your Console
Size considerations:
- 12-18 inches deep maximum
- 48-60 inches wide typical
- Mount 28-32 inches from floor
Style:
- Handleless/integrated hardware (like inspo)
- Matches or contrasts with slat color
- The inspo uses dark console against light slats—great contrast
Materials:
- Wood veneer
- Lacquered finish
- Laminate
- Matching or complementary to slats
Storage:
- Drawers for concealed storage
- Open shelves (less common in hallways)
- Combo of both
Installation Tips
Mount to studs: Non-negotiable for floating furniture.
Install before or after slats:
- After slats: Slats provide backing/support
- Before slats: Slats integrate around it
Allow wire access: For lamps or charging stations.
Level is critical: Floating furniture shows any tilt immediately.
Weight capacity: Ensure hardware can support console + items on it.
Lighting Strategy for Slat Walls
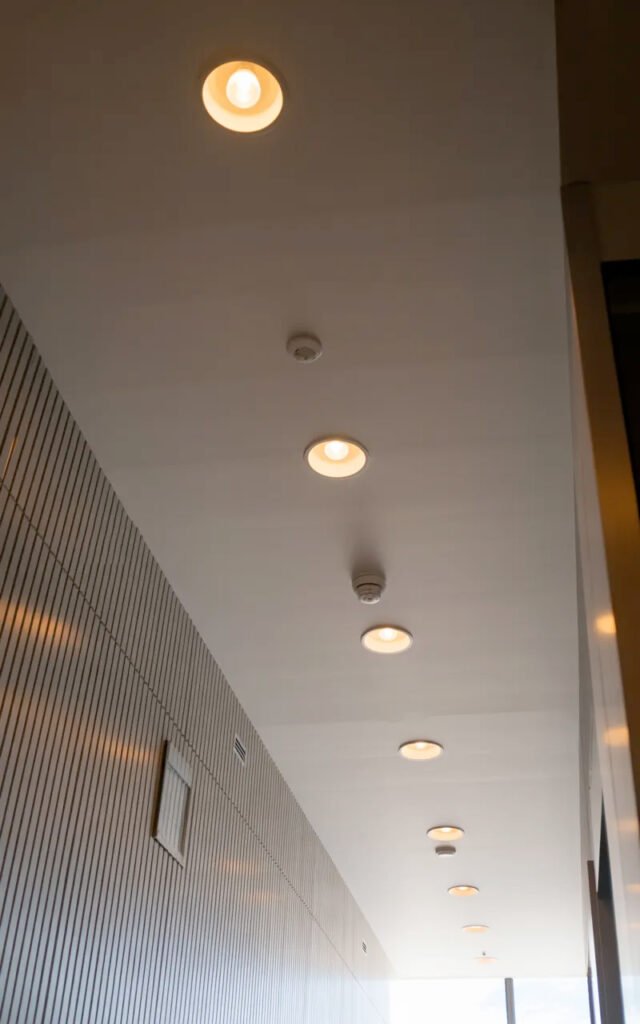
The recessed lighting in the inspiration image is perfect for highlighting slat texture. Let’s talk modern narrow hallway lighting.
How Lighting Affects Slat Walls
Creates shadow and depth: Light hitting vertical slats from above creates beautiful shadow lines.
Emphasizes texture: Side lighting shows dimensionality.
Can wash the wall: Uplight or downlight creates drama.
Makes slats the feature: Proper lighting turns them from background to focal point.
Best Lighting for Slat Walls
Recessed ceiling lights (like the inspo):
Placement:
- Spaced 4-6 feet apart down hallway
- Can angle toward slat wall
- Creates dramatic shadows
Why they work:
- Clean, no visual clutter
- Downlight emphasizes vertical lines
- Modern aesthetic matches slats
Installation:
- Professional electrician needed
- Not renter-friendly
- Worth it for the effect
Track lighting:
Pros:
- Adjustable spots can aim at slat wall
- Highlights texture
- Easier to install than recessed
Cons:
- More visible hardware
- Can feel dated if wrong style chosen
Wall sconces:
When to use:
- On wall opposite slat wall
- Creates cross-lighting
- Adds ambient glow
Placement:
- Every 6-8 feet
- Mount at 60-65 inches high
LED strip lighting:
Hidden behind console:
- Creates floating effect
- Subtle ambiance
- Modern touch
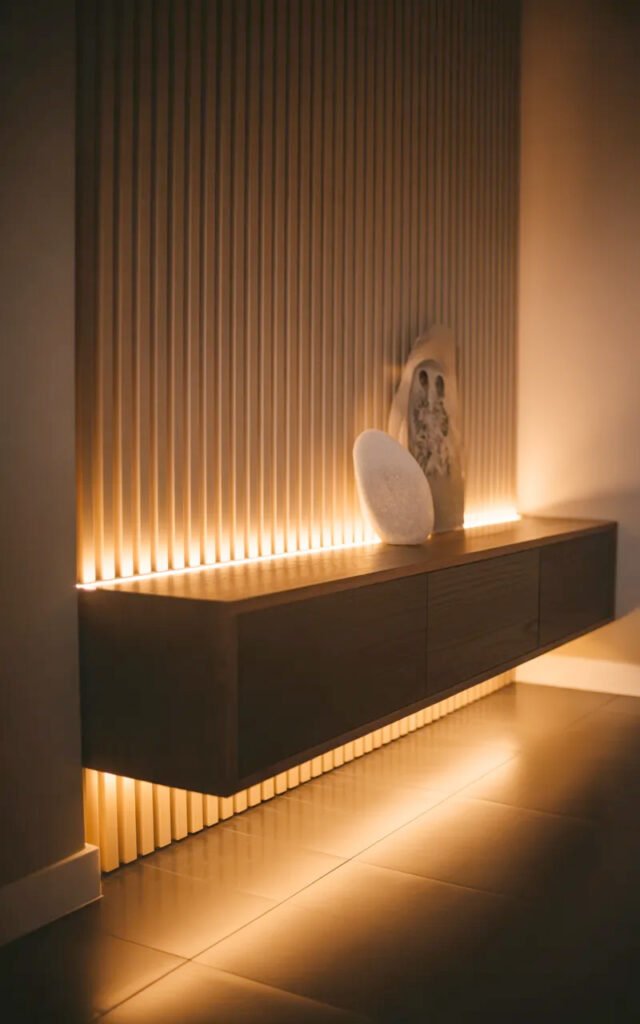
Behind top or bottom of slats:
- Wash lighting effect
- Very contemporary
- Requires planning during installation
I have three recessed lights spaced evenly down my hallway, slightly angled toward my slat wall. The shadows they create on the slats at night are honestly the best part of the design.
Color and Finish Choices
The natural wood tone in the inspiration image is classic, but you have options.
Natural Wood Finish
Stain options:
- Natural/clear (shows wood grain)
- Light oak or honey
- Medium walnut
- Dark espresso or ebony
Why natural wood works:
- Adds warmth to white hallways
- Timeless and organic
- Works with multiple styles
- The inspo choice—always elegant
Considerations:
- Shows imperfections in wood
- Need to select good-quality lumber
- Requires proper staining technique
- Maintenance (can scratch or dent)
Painted Slats
White or off-white:
- Clean, Scandinavian
- Makes small spaces feel larger
- Less dramatic than wood
- Easier to change later
Black or charcoal:
- Bold, modern
- Creates strong contrast
- Can make narrow hallway feel smaller
- Very contemporary
Match wall color:
- Tonal, subtle approach
- Texture without color contrast
- Sophisticated and understated
Accent color:
- Navy, forest green, or warm terracotta
- Bold statement
- Risk of dating quickly
The Contrast Question
Light slats + dark console (like inspo):
- Creates visual interest
- Defines each element
- Modern, intentional
Matching slats and console:
- Cohesive, built-in look
- More subtle
- Can feel less dynamic
Dark slats + light console:
- Reverse contrast
- Can work but less common
The inspiration image’s light wood slats with dark gray console is perfect—enough contrast to define each element without being jarring.
The Mirror and Art Strategy
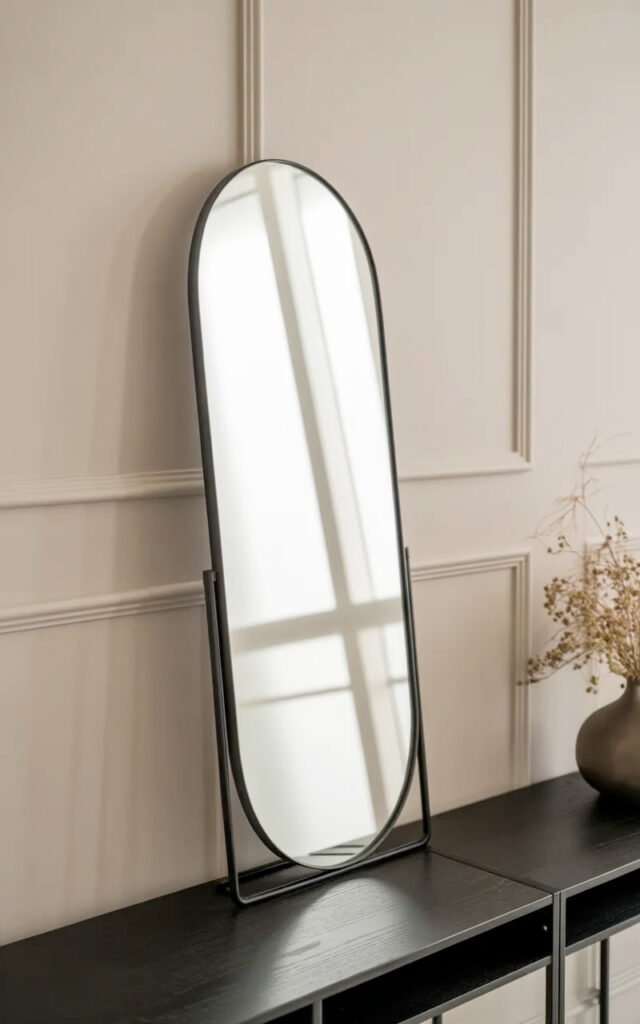
That tall oval mirror in the inspiration image is doing important work. Let’s decode the wall decor approach.
Large Mirrors in Narrow Hallways
Why mirrors work:
- Reflect light (critical in windowless hallways)
- Create illusion of more space
- Provide function (last check before leaving)
- Add elegance
Size and shape:
- Tall and narrow (like inspo oval): Perfect for narrow hallways
- Full-length leaning: If you have floor space
- Round or oval: Softer than rectangular
Placement on slat wall:
- Lean against wall on console (like inspo)
- Or mount directly to slats
- Position to reflect light sources
Frame style:
- Thin black metal (like inspo): Modern, minimal
- Wood frame: Matches slat warmth
- No frame: Contemporary, clean
Art Selection for Slat Walls
What works:
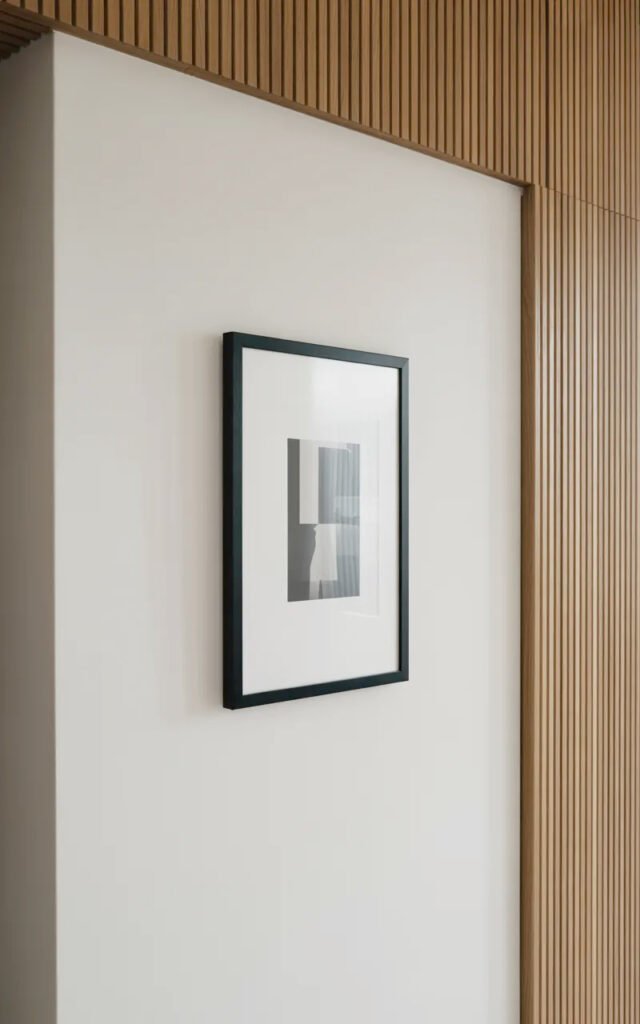
- Black and white photography (like inspo)
- Simple line drawings
- Minimal abstract pieces
- Consistent framing
What to avoid:
- Too many pieces (competes with slat texture)
- Very colorful or busy art (too much visual noise)
- Ornate frames (clashes with modern slats)
Placement:
- On wall opposite slats (like inspo)
- Or integrate into slat wall with careful planning
- Keep it minimal—slats are the feature
The inspo has maybe 2-3 pieces of framed art on the opposite wall—perfect balance. The slat wall is the star; art supports but doesn’t compete.
Flooring That Complements Slat Walls
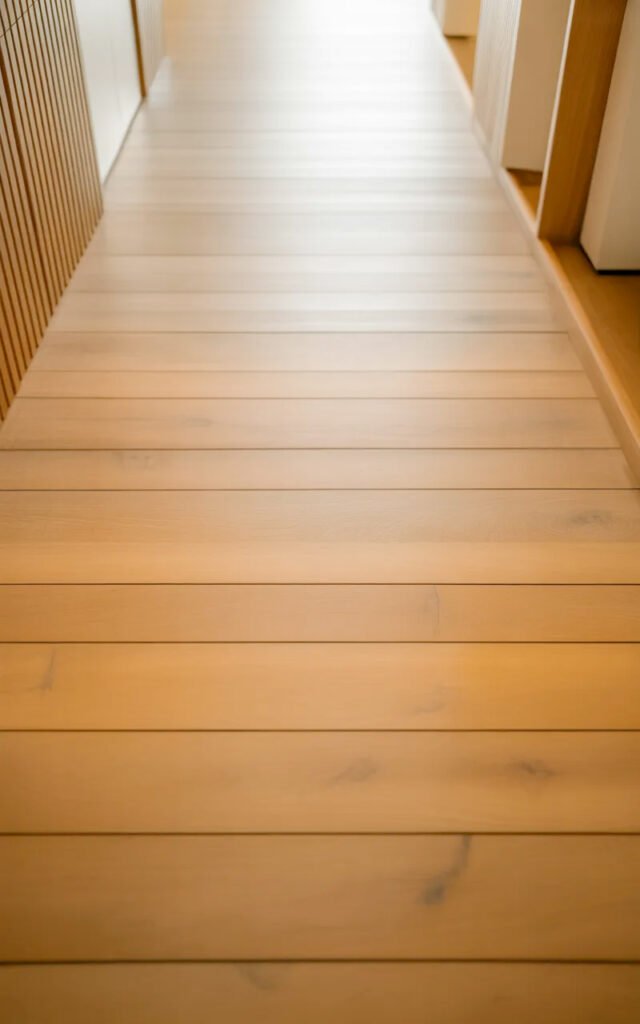
The light wood-look flooring in the inspiration image coordinates beautifully with the slat wall.
Best Flooring Choices
Light wood (like the inspo):
- Coordinates with wood slats
- Keeps hallway bright
- Wide planks best
- Natural oak, ash, or maple
Luxury vinyl plank (LVP):
- Wood look, waterproof
- More affordable
- Durable for high traffic
- Wide planks available
Light tile:
- Large format
- Cream, beige, or light gray
- Less common with wood slats but can work
Neutral carpet:
- Softens sound
- Warm underfoot
- Shows wear in hallways
- Less common in modern designs
Color Coordination
Tone-on-tone (like inspo):
- Floor similar to slat color
- Cohesive, soothing
- Makes space feel larger
Contrast:
- Dark floor + light slats
- Or light floor + dark slats
- More dramatic
- Can make space feel smaller
The inspo’s light floor + light slats creates a bright, airy, cohesive look—smart for a narrow hallway.
DIY Slat Wall Installation Guide
Want to tackle this yourself? Here’s the basic process.
Materials Needed
For a 12-foot long x 8-foot high wall:
- 1×2 or 1×3 lumber (or rip plywood): ~30-40 pieces
- Furring strips or backing boards: 6-8 pieces
- Construction adhesive
- Finish nails or brad nails
- Stain or paint
- Polyurethane (if staining)
- Saw (miter or circular)
- Level
- Nail gun (or hammer and patience)
Estimated cost: $200-400 depending on materials
Basic Steps
1. Plan and measure:
- Decide slat width and spacing
- Calculate how many slats you need
- Purchase materials with 10% extra
2. Prepare wall:
- Clean and repair any damage
- Paint backing wall (if slats won’t be tight together)
- Install horizontal furring strips for support
3. Cut slats:
- All to same height (floor to ceiling or baseboard to ceiling)
- Sand edges smooth
- Pre-finish (stain/paint) before installing
4. Install:
- Start from one end
- Use spacers to maintain consistent gaps
- Level each slat vertically
- Secure with adhesive and finish nails
- Work across the wall methodically
5. Finish:
- Fill nail holes (if painting)
- Touch up any damage
- Apply final finish coat if needed
Time estimate:
- Prep and cutting: 4-6 hours
- Installation: 6-10 hours
- Total: One weekend for most people
Common DIY Mistakes
Inconsistent spacing: Use the same spacer throughout.
Not level: Check every slat with a level—it’s tedious but necessary.
Poor quality lumber: Warped or damaged wood shows. Inspect before buying.
Inadequate support: Slats need backing/furring strips for stability.
Rushing the finish: Stain/paint before installing for best results.
Budget Breakdown: Slat Wall Hallway ($800-1,200)
Slat wall materials (DIY): $250-400
- Lumber, adhesive, nails, finish
Floating console: $200-400
- IKEA or similar wall-mounted cabinet
Mirror: $80-150
- Large oval or rectangular
Lighting upgrade: $150-300
- Recessed lights (if not existing)
- Or LED strips
Paint/prep: $50
- For opposite wall and ceiling
Art/accessories: $70
- Frames and prints
Total DIY: ~$800-1,370
Professional installation: Add $500-1,000 for slat wall installation
Small vs. Large Hallway Adaptations
Narrow hallways (36-42 inches wide):
- One slat wall only (like inspo)
- Slim console (12-14 inches deep)
- Minimal additional decor
Medium hallways (42-48 inches wide):
- Can consider two walls if desired
- Standard console (16 inches deep)
- More flexibility
Wide hallways (48+ inches):
- Two slat walls possible
- Fuller console or furniture
- More decorative freedom
Maintenance and Care
Weekly:
- Dust slats with microfiber duster
- Wipe console surface
Monthly:
- Vacuum between slats if needed
- Clean mirror
- Dust artwork
Annually:
- Check for loose slats
- Touch up finish if scratched
- Deep clean entire wall
Long-term:
- Wood slats may need refinishing in 5-10 years
- Painted slats easier to touch up
- Generally very low maintenance
Alternative Slat Wall Approaches
Pre-made panels:
- Purchase ready-to-install slat panels
- Most expensive but easiest
- $150-300 per panel
Peel-and-stick options:
- Faux slat wall wallpaper or panels
- Renter-friendly
- Less convincing but okay from distance
- $50-150
Partial wall:
- Lower half only (like wainscoting)
- Less material and time
- More affordable
- Still impactful
Painted version:
- Use MDF instead of wood
- Paint instead of stain
- Often more affordable
- Different aesthetic
Styling Your Slat Wall Hallway
On the console:
- Leaning mirror (like inspo)
- Table lamp for ambient light
- Small plant or decorative object
- Catchall dish for keys
- Keep it minimal (2-3 items max)
On opposite wall:
- Minimal art (like inspo)
- 2-3 pieces maximum
- Matching frames
- Simple subjects
Avoid:
- Cluttering the console
- Too much art competing with slats
- Anything that sticks out into walkway
- Bright colors (keep neutral)
When Slat Walls Don’t Work
Skip slat walls if:
- Your hallway is extremely narrow (under 36 inches)
- You prefer traditional/classic decor
- Budget is very tight
- You’re renting and can’t install
- You want to change things frequently
Better alternatives:
- Simple paint and art
- Wallpaper accent wall
- Wainscoting
- Gallery wall
Slat walls are a commitment—make sure you love the modern aesthetic.
Final Thoughts: Transform Your Hallway
A slat wall transforms a boring narrow hallway into an architectural moment. The inspiration image proves it: vertical wood slats adding texture and warmth, a sleek floating console providing function, perfect recessed lighting creating drama, and minimal styling keeping it sophisticated.
This isn’t a small weekend project—it requires planning, materials, and time. But the impact? Absolutely worth it. Your hallway goes from “thing I tolerate” to “thing I show off to guests.”
Start by deciding if this aesthetic matches your home and budget. If yes, plan carefully: which wall, what materials, what finish. Consider hiring out the parts you’re not comfortable with (like electrical work). Take your time with installation—rushed slat walls look amateur.
My slat wall hallway is hands-down the best design decision I made in my home. Every time I walk through, I appreciate the texture, the shadows, the warmth. Total investment: about $900 and two weekends of work. Impact: priceless.
Your narrow hallway doesn’t have to be boring. Give it the architectural treatment it deserves, and create a space that’s as beautiful as it is functional. 🙂