I’ll never forget walking into a friend’s newly renovated townhouse and stopping dead in my tracks at their entryway. The panelling. That gorgeous wall panelling running up the stairs and down the hallway made their standard builder-grade home look like it had been there for a hundred years—in the best possible way.
“Did this come with the house?” I asked, genuinely confused.
“Nope. We added it last month. Cost less than you’d think.”
That conversation sent me down a rabbit hole of panelling hallway and stairs research, and six weeks later, my own boring hallway had been transformed into something that looked like it belonged in a period home. Friends thought I’d hired professionals. Total cost: about $400. Total time: two weekends.
If you’re looking at your plain hallway walls and wishing they had more character, more architecture, more… something, entrance hall with panelling might be exactly what you need. Let me show you how to get that elevated, traditional look without breaking the bank or your spirit.
Understanding Hallway Panelling
Before we start measuring and cutting, let’s talk about what panelling actually is and why it’s having such a major moment in hallways interior design.
What Is Wall Panelling?
Definition: Decorative molding or trim applied to walls to create raised or recessed rectangular panels, adding architectural interest and dimension.
Also called:
- Wainscoting (when on lower half only)
- Picture frame molding
- Panel molding
- Wall frames
- Decorative molding
Key characteristics:
- Creates geometric patterns (usually rectangles)
- Adds depth and shadow
- Can be painted to match or contrast with walls
- Typically involves chair rail, base molding, and panel frames
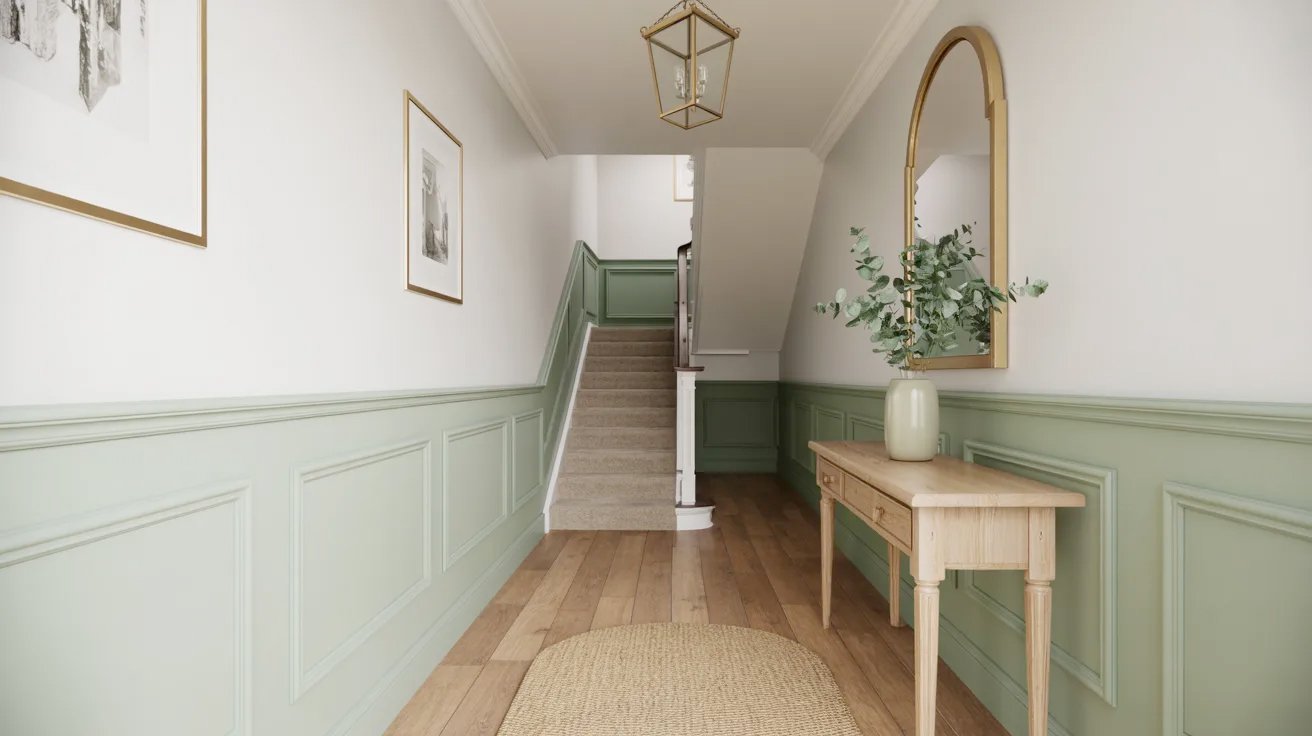
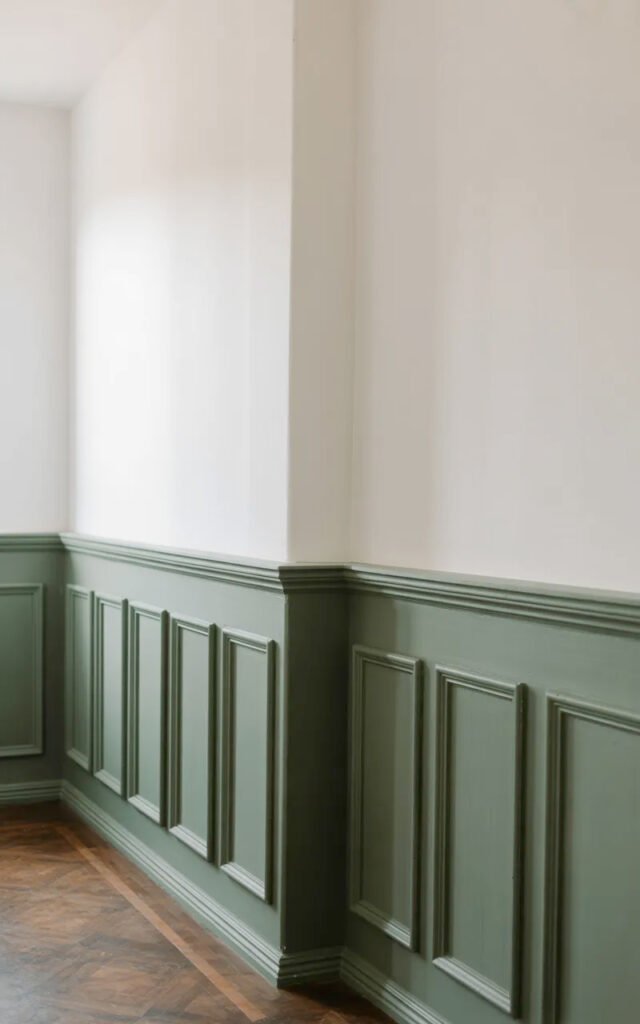
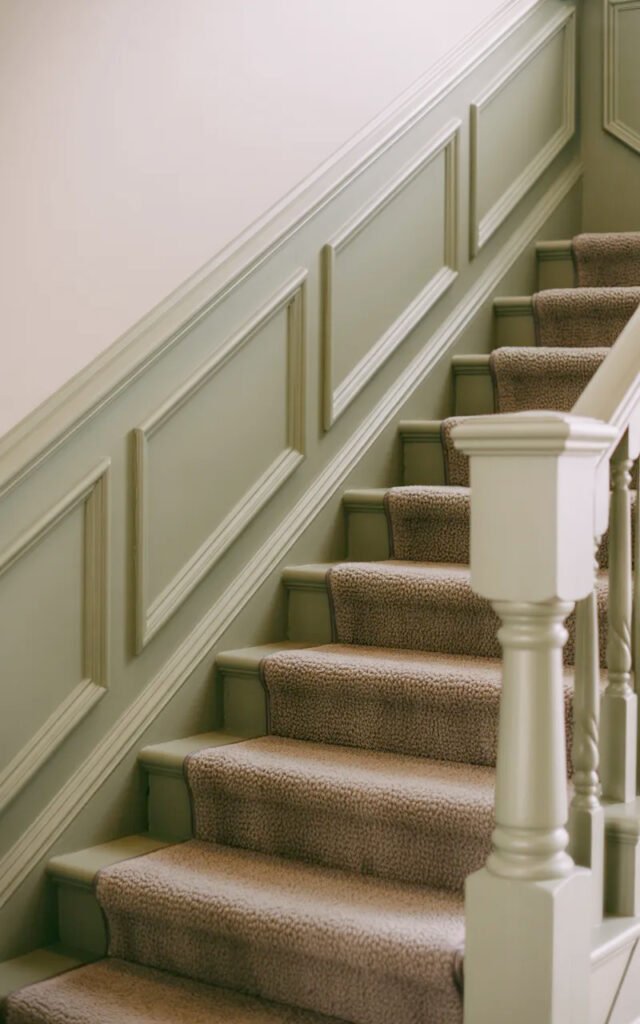
The inspiration image shows classic panel molding painted in a beautiful soft sage green on the lower portion—textbook elegant hallway panelling.
Why Panelling Works in Hallways
Adds architectural interest: Transforms flat, boring walls into featured elements.
Creates traditional elegance: Instant period-home character.
Protects walls: Practical in high-traffic areas where walls get bumped and scuffed.
Defines space: Especially effective in long hallways or with staircases.
Hides imperfections: Covers damaged or uneven walls.
Increases perceived value: Makes home feel more expensive and custom.
Versatile styling: Works from traditional to modern depending on execution.
Full Height vs. Half Height Panelling
Half-height (wainscoting) – like the inspo:
Typical height: 32-36 inches from floor
Pros:
- Classic, traditional look
- More affordable (less wall to cover)
- Easier DIY project
- Creates two-tone wall opportunity
- Protects lower wall (most impact zone)
Cons:
- Doesn’t fill entire wall
- Can make low ceilings feel lower
Full-height panelling:
Pros:
- More dramatic impact
- Works on stairs where half-height is awkward
- Creates cohesive look floor to ceiling
Cons:
- More expensive (more materials)
- More time-consuming
- Can overwhelm small spaces
- Trickier DIY
For most hallways and stairs, the half-height approach (like the inspiration image) is the sweet spot—maximum impact for reasonable effort and cost.
Choosing Your Panelling Color
The soft sage green in the inspiration image is absolutely gorgeous. Let’s talk about traditional hallway decor color strategies.
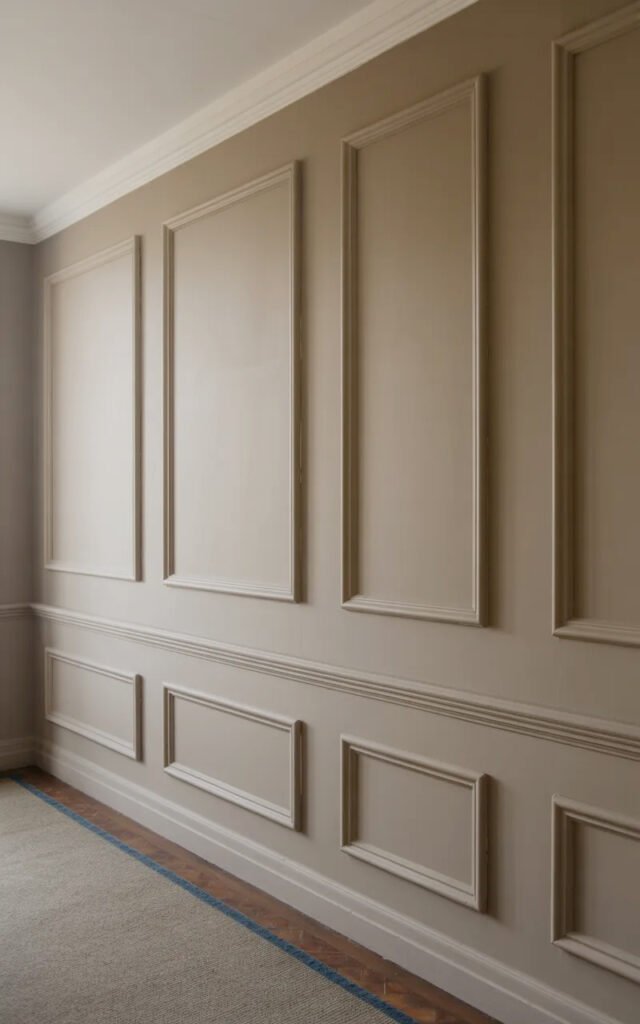
Two-Tone Wall Treatment
Lower panelling in color + upper wall neutral:
Why it works:
- Adds color without overwhelming
- Creates visual interest
- Feels collected and intentional
- The upper white/cream keeps it bright
Popular combinations:
- Sage green + cream (like inspo)
- Navy + white
- Soft gray + off-white
- Warm taupe + cream
- Charcoal + light gray
Lower panelling in white + upper wall color:
Why it works:
- Reverses the traditional approach
- Can make ceilings feel higher
- Works well in modern homes
Both walls same color:
Why it works:
- Monochromatic, sophisticated
- All about texture vs. color
- Makes small spaces feel larger
- Very Scandinavian/modern
Best Colors for Hallway Panelling
Traditional choices:
Soft greens (like inspo):
- Sage, eucalyptus, or olive
- Brings nature indoors
- Calming and elegant
- Very on-trend
Navy or dark blue:
- Classic, sophisticated
- Creates drama
- Works in wider hallways
- Feels traditional yet fresh
Soft grays:
- Neutral and versatile
- Works with any decor
- Timeless
- Less bold than colors
Warm neutrals:
- Greige, taupe, warm beige
- Classic and safe
- Never goes out of style
- Easy to decorate around
White or cream:
- All one color
- Relies on texture for interest
- Brightest option
- Very cottage/coastal
The inspiration image’s soft sage is absolutely perfect—enough color to be interesting without being overwhelming, and the warmth works beautifully with the wood tones.
Paint Finish Matters
For panelling:
- Eggshell or satin
- Slight sheen shows off molding detail
- Easier to clean (high-traffic area)
- More durable than matte
For upper walls:
- Matte or eggshell
- Creates subtle contrast with panelling
- Feels more traditional
I used Farrow & Ball’s “Pigeon” (a soft gray-green similar to the inspo) on my panelling with “Pointing” (warm white) above. The combination is sophisticated and timeless.
Panel Layout and Proportions
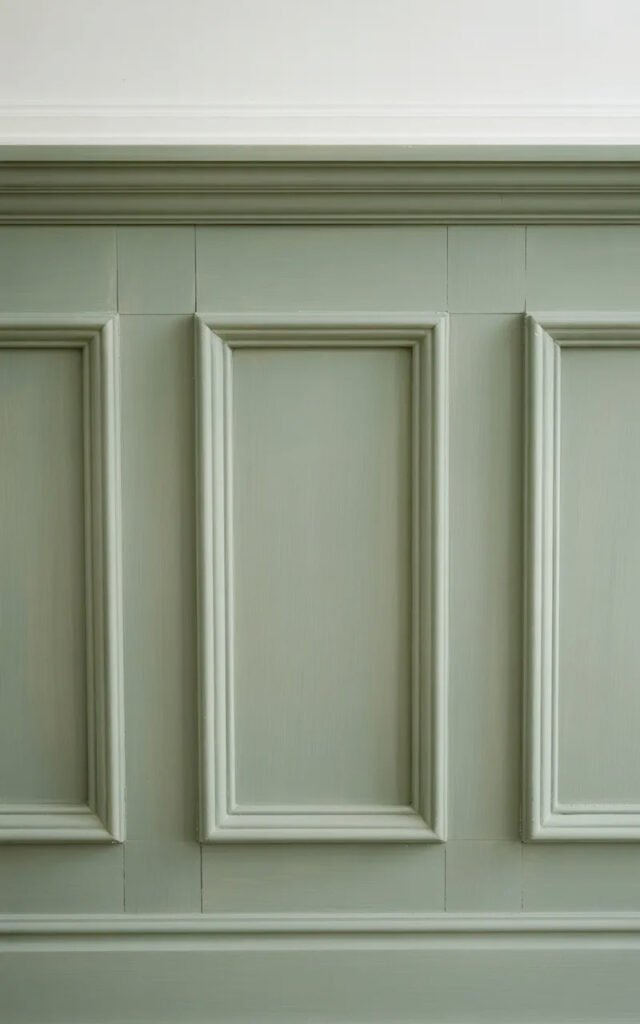
The panelling in the inspiration image has beautiful proportions. Getting this right is critical.
Classic Panel Proportions
Height of panelling:
- 32-36 inches from floor (standard chair rail height)
- The inspo appears to be about 36 inches
- In 8-foot ceilings, this is roughly 1/3 wall height
- In higher ceilings, can go up to 42 inches
Panel sizing:
- Rectangles typically in a 3:5 or 2:3 ratio (vertical:horizontal)
- Roughly 18-24 inches wide
- Spaced evenly along wall
- Should feel balanced, not cramped
Spacing between panels:
- Usually 4-8 inches between each rectangle
- Keep consistent throughout
- Depends on your wall width
Planning Your Layout
Measure your wall:
- Total width and height
- Note any doors, outlets, switches
Decide panel count:
- Typically 2-4 panels per wall section
- More panels = busier look
- Fewer panels = more stately
Create symmetry:
- Center panels on wall
- Equal spacing on ends
- Balance around doors/stairs
Account for obstacles:
- Outlets and switches
- Doorways and trim
- Staircase angles
- Built-in features
Mock it up:
- Use painter’s tape to map panels on wall
- Stand back and assess
- Adjust before committing
- Take photos to evaluate
I spent an entire evening mapping my panelling layout with blue tape. Totally worth it—caught several spacing issues before I started cutting.
Materials and Molding Selection
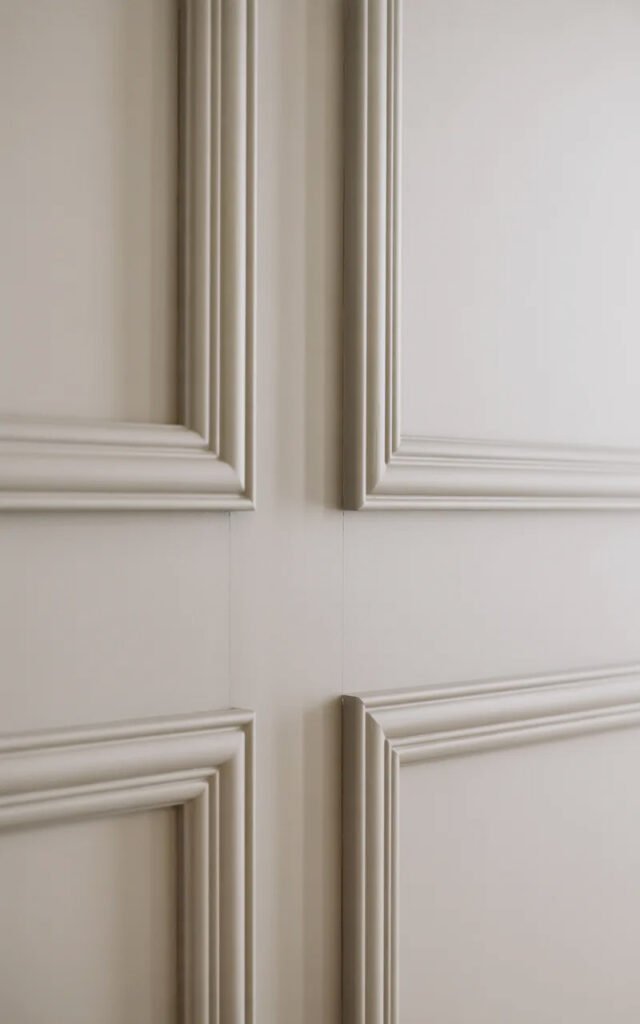
The crisp, clean panelling in the inspiration image comes from choosing the right materials.
Molding Types You’ll Need
Chair rail (tops the panelling):
- Decorative horizontal molding
- Typically 2-3 inches tall
- Creates finished edge
- Many profiles available

Base molding (bottom):
- Where panelling meets floor
- Usually 3-5 inches tall
- Provides visual weight
Panel molding (creates rectangles):
- Thin trim (½-¾ inch wide)
- Creates frame outlines
- Can be simple or detailed
Corner molding (optional):
- Decorative corners where panels meet
- Adds extra detail
- More traditional look
Material Choices
MDF (medium-density fiberboard):
- Pros: Smooth, paintable, affordable, consistent
- Cons: Heavy, can swell if wet, less “real” feeling
- Best for: Painted applications (like the inspo)
- Cost: Most affordable option
Primed pine:
- Pros: Real wood, takes paint well, lighter than MDF
- Cons: Can have knots, may warp slightly
- Cost: Mid-range
Poplar:
- Pros: Hardwood, smooth, stable, paintable
- Cons: More expensive
- Cost: Higher end
PVC/composite:
- Pros: Waterproof, won’t rot, very stable
- Cons: Doesn’t feel like wood, limited profiles
- Cost: Mid to high range
For painted panelling (like the inspo), MDF is honestly your best bet—smooth finish, takes paint beautifully, and most affordable.
Pre-Made vs. Custom
Pre-made panel kits:
- Available online and at home stores
- Set sizes and layouts
- Easiest installation
- Limited customization
- $200-500 per wall
Custom DIY:
- Purchase molding separately
- Cut and install yourself
- Fully customizable
- More time and skill required
- $100-300 in materials per wall
Professional installation:
- Hire trim carpenter
- Perfect results
- Most expensive
- $500-1,500+ per wall installed
I went the custom DIY route using MDF molding. More work, but I got exactly the layout I wanted for about $250 in materials.
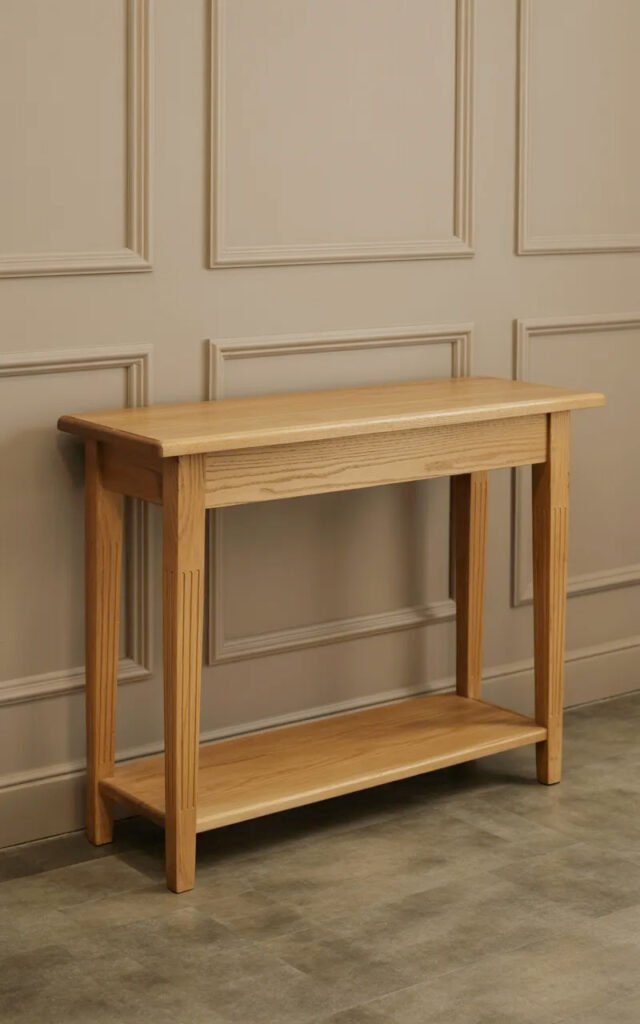
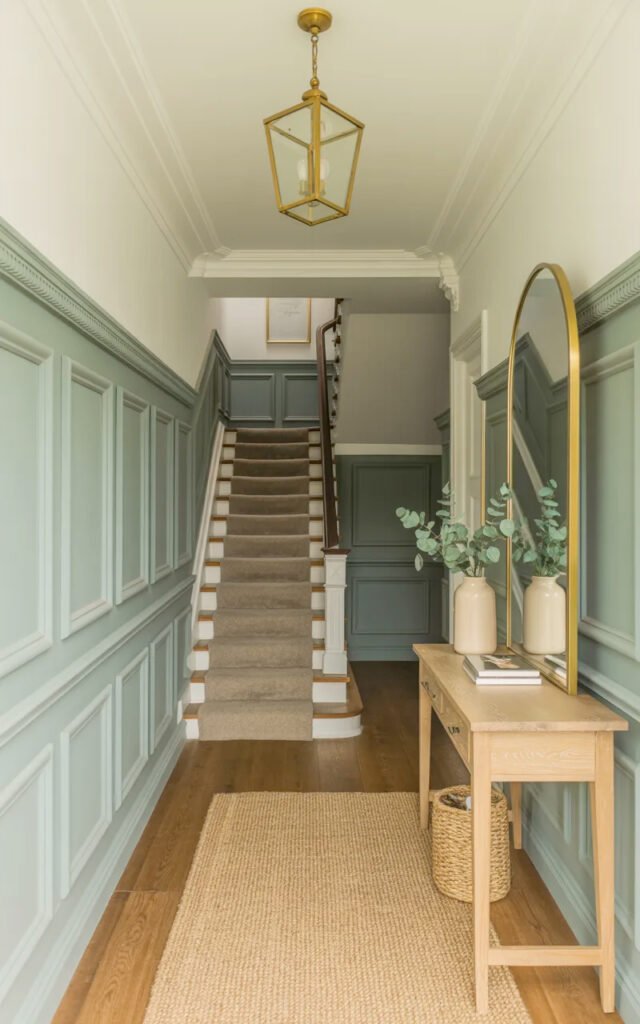
The Console Table Addition
That simple wood console table in the inspiration image is the perfect complement to the panelling. Let’s talk townhouse entrance hall furniture.
Why Console Tables Work
Provides function: Keys, mail, phone charging.
Adds warmth: Wood element balances painted panelling.
Creates styling opportunity: Display space for decor.
Defines the space: Anchors the hallway visually.
Doesn’t narrow hallway: If sized correctly.
Choosing the Right Console
Size considerations:
- Width: 36-48 inches typical
- Depth: 12-14 inches maximum (like inspo)
- Height: 30-32 inches (standard table height)
Style:
- Simple wood (like inspo): Warm, natural, traditional
- Painted wood: Coordinates with panelling color
- Metal and wood: More contemporary
- Glass top: Lighter visual weight
Features to look for:
- Shelf below for baskets/storage
- Drawer for concealed storage
- Slim profile that doesn’t protrude
The inspiration image shows a simple oak or pine console—perfect scale and style for the space.
Placement Tips
Against panelled wall:
- Like the inspo
- Integrated look
- Panelling provides backdrop
Opposite the stairs:
- Creates balance
- Uses otherwise dead space
Height relationship:
- Top of console typically hits below chair rail
- Allows wall above for mirror/art
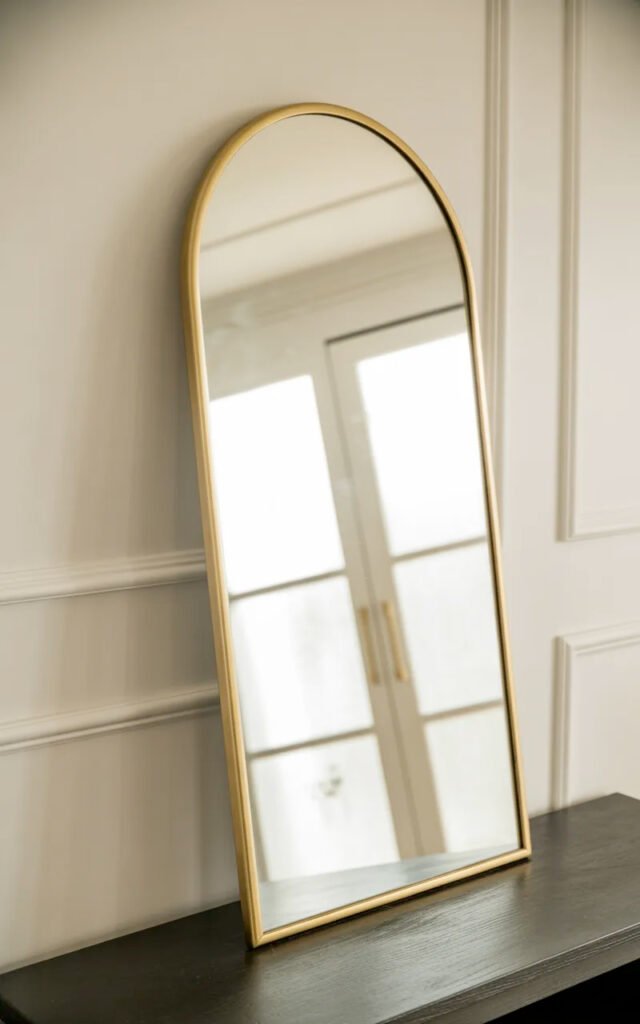
The Mirror Strategy
That gorgeous gold-framed arched mirror in the inspiration image is doing important work. Let’s decode feature hallway mirror placement.
Why Mirrors Are Essential
Reflect light: Critical in hallways with limited natural light.
Create space: Make narrow hallways feel wider.
Provide function: Last check before leaving house.
Add elegance: Especially with beautiful frames.
Become focal point: Draw eye and create interest.
Mirror Shapes and Styles
Arched top (like inspo):
- Classic, traditional
- Softens rectangular panelling
- Very elegant
- Currently very trendy
Round or oval:
- Soft, organic shape
- Contrasts with panel geometry
- Works in various styles
Rectangular:
- Most traditional
- Can be vertical or horizontal
- Simpler aesthetic
Size guidelines:
- Should be substantial (not tiny)
- The inspo mirror looks about 30-36 inches tall
- Width roughly 2/3 of console width below
Frame Finishes
Gold or brass (like inspo):
- Warm, traditional, elegant
- Works beautifully with green or blue panelling
- Adds luxury feel
- Very popular currently
Wood:
- Natural, warm
- Matches console
- More casual
Black:
- Modern, crisp
- Strong contrast
- Contemporary edge
White or cream:
- Soft, cottage-like
- Blends with walls
- Subtle
The inspiration image’s gold-framed arched mirror is absolutely perfect—traditional elegance that elevates the entire space.
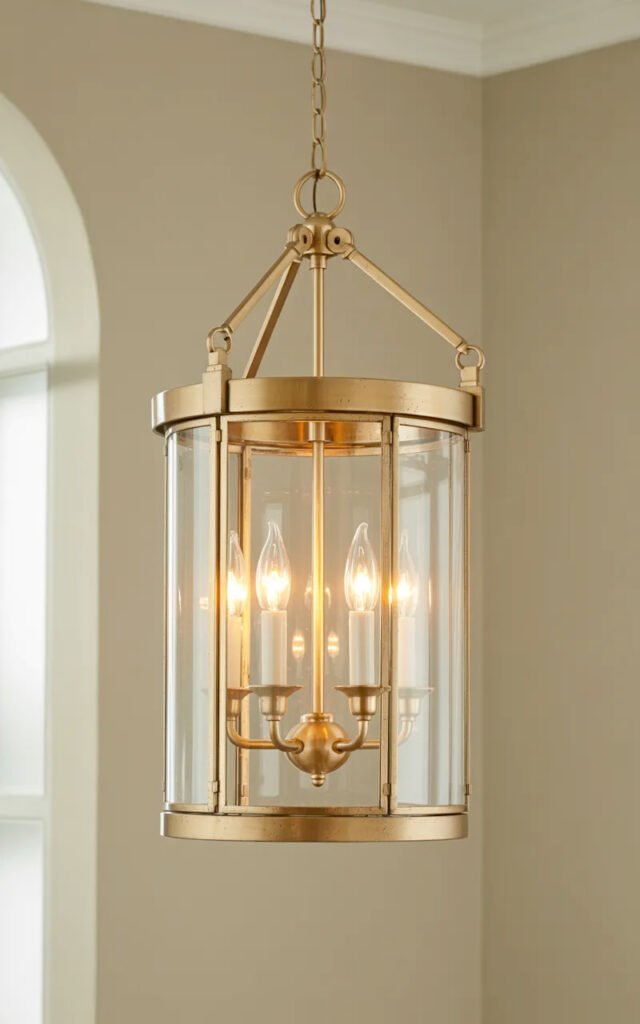
Lighting: The Chandelier Element
That beautiful brass lantern pendant in the inspiration image transforms the hallway from nice to special.
Why Statement Lighting Matters
Creates focal point: Draws eye upward.
Adds elegance: Instant luxury upgrade.
Provides necessary light: Hallways need good illumination.
Shows commitment: Says “this space matters.”
Defines style: Traditional fixture = traditional space.
Best Hallway Light Fixtures
Lantern pendants (like inspo):
- Classic, traditional
- Works over stairs or in hallways
- Brass, bronze, or black finishes
- Candle-style or single bulb
Semi-flush mounts:
- Lower ceilings (under 8 feet)
- Still decorative
- More affordable
- Many traditional styles
Multiple pendants:
- Down a long hallway
- Creates rhythm
- More modern approach
Chandelier:
- If ceiling height allows
- Very traditional and elegant
- Can overwhelm small spaces
Size and Placement
Sizing:
- Measure hallway width in feet
- Add numbers together
- Result in inches = diameter
- Example: 4′ + 6′ = 10″ diameter minimum
Height:
- Bottom of fixture at least 6’6″ from floor
- Higher over stairs where no one walks under
- Ensure door clearance
Finish coordination:
- Match mirror frame (brass with brass like inspo)
- Or coordinate with door hardware
- Consistency creates polish
I installed a brass lantern pendant similar to the inspo ($180 from Wayfair). Had an electrician install it ($150). Total: $330. Impact: makes my hallway feel like a boutique hotel.
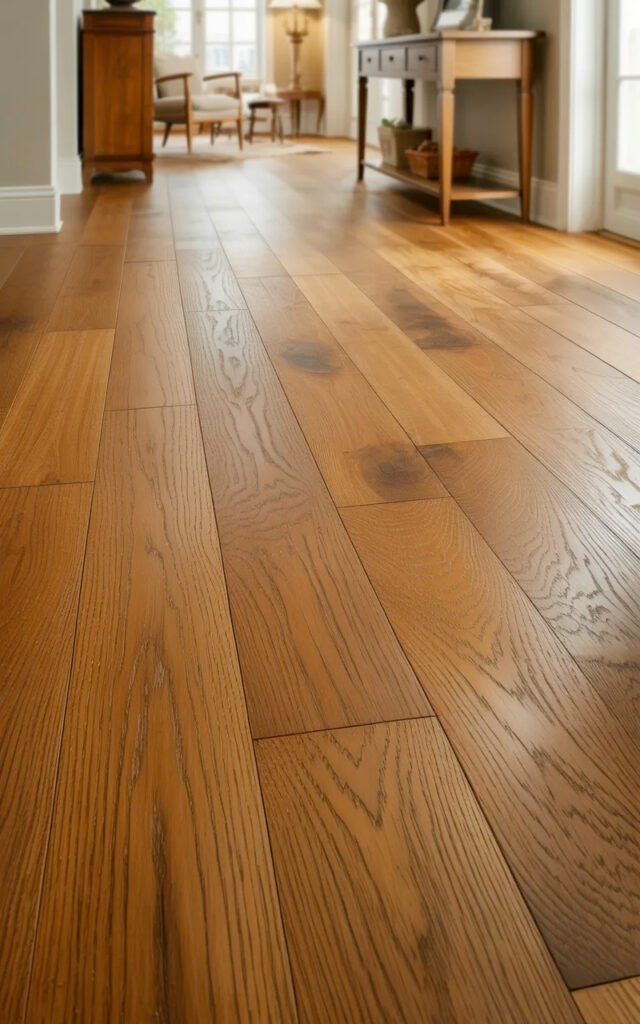
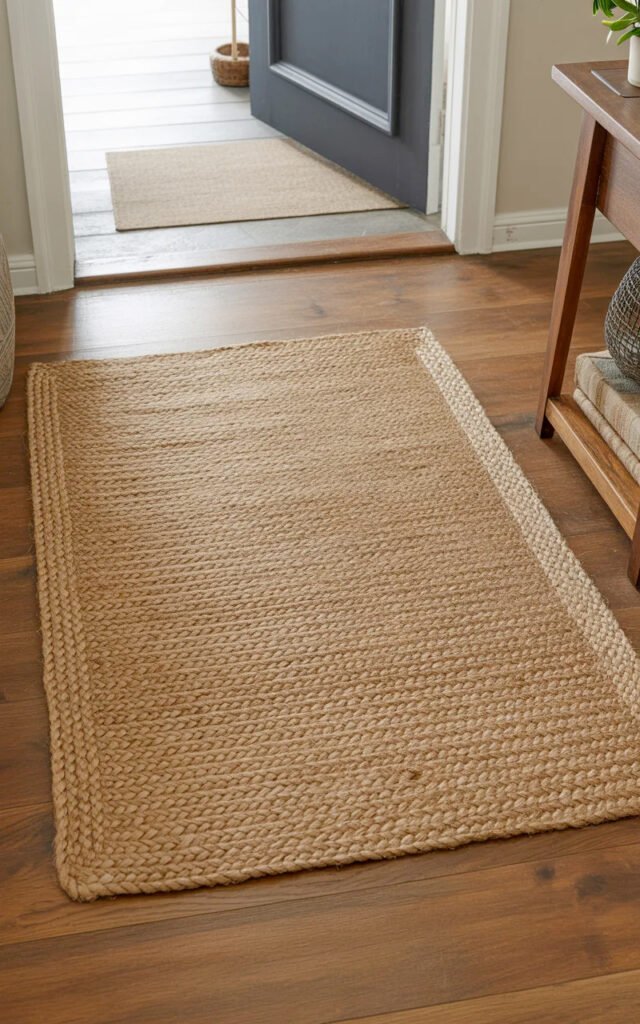
Flooring Coordination
The warm wood floor in the inspiration image complements the panelling beautifully.
Best Flooring for Panelled Hallways
Natural wood (like inspo):
- Oak, maple, or pine
- Warm honey to medium brown tones
- Classic and timeless
- Coordinates with wood console
Engineered wood:
- More stable than solid
- Easier installation
- Looks identical to real wood
- More affordable
Luxury vinyl plank:
- Wood look, waterproof
- Very durable
- Budget-friendly
- Wide planks look best
Neutral tile or stone:
- Cream, beige, or light gray
- More formal
- Very durable
- Can feel cold
Color Coordination
Warm wood + warm panelling colors:
- Like the inspo (wood + sage green)
- Cohesive and harmonious
- Traditional and elegant
Contrast approach:
- Dark floors + light panelling
- Or light floors + dark panelling
- More dramatic
- Can make space feel smaller
Monochromatic:
- All light or all medium tones
- Most spacious feeling
- Very Scandinavian
The inspiration image’s medium-warm wood floor with soft green panelling is perfection—warm, welcoming, and timeless.
Styling Your Panelled Hallway
The simple eucalyptus in a cream vase on the console in the inspiration image shows perfect restraint.
Console Styling Formula
The inspo has:
- Large mirror (focal point)
- Console table (function)
- One vase with greenery (life)
- Maybe a small sconce on wall
That’s it. Perfect.
What to Include
Essential elements:
- Mirror (already discussed)
- One plant or greenery (fresh or dried)
- Catchall for keys (tray or bowl)
- Maybe table lamp if needed

Optional additions:
- Stack of 2-3 books
- Small decorative object
- Candle
Maximum items on console: 3-5 total
What to Avoid
Don’t add:
- Too many small objects (clutter)
- Multiple vases or plants
- Seasonal decor overload
- Overly themed items
- Things you don’t actually use
The rule: Every item should be functional, beautiful, or ideally both.
Wall Decor Above Panelling
On upper wall (above panelling):
- Simple framed art (like inspo has on right)
- 1-2 pieces maximum per wall section
- Matching frames (gold to coordinate)
- Simple subjects (botanical, abstract, photography)
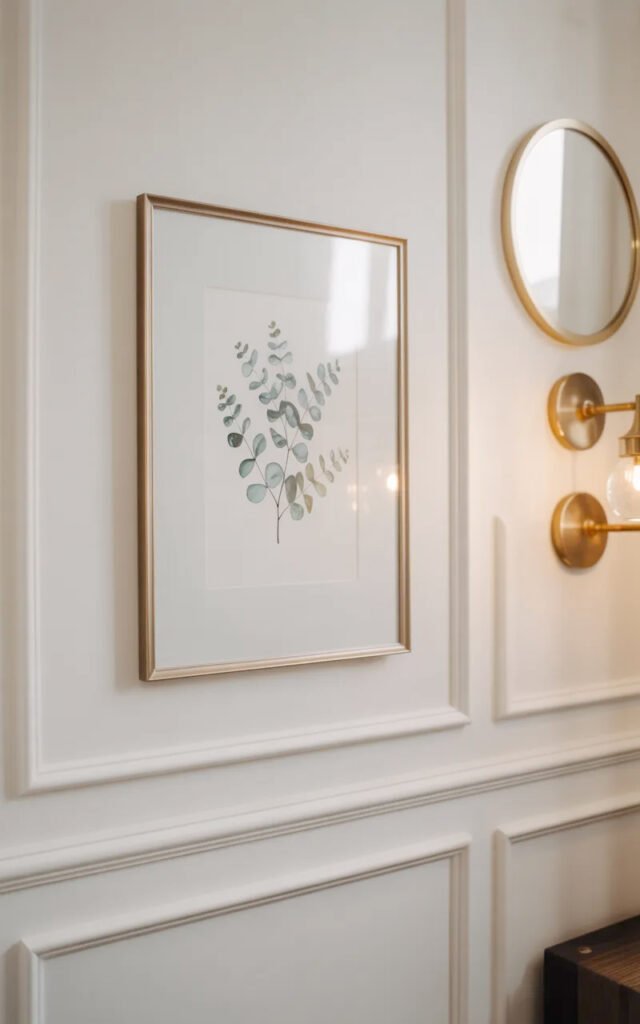
Keep it minimal: Panelling is the feature; don’t compete with it.
I have one tall mirror on my console and two small gold-framed botanical prints on the upper wall. That’s all. Less is absolutely more when you have architectural panelling.
Staircase Panelling Integration
The inspiration image shows panelling continuing up the stairs—this is where it gets tricky but impactful.
Extending Panelling to Stairs
Why it works:
- Creates cohesive look
- Defines hallway and stair relationship
- Adds architectural interest to stairs
- Protects stair walls from damage
Challenges:
- Angled cuts where panels meet stairs
- Measuring is more complex
- Takes more time and skill
- Easy to mess up
Options:
- Full height on stairs: Panelling continues at same height as hallway
- Stepped approach: Panels “step up” with stairs
- Skip it: Only panel hallway, not stairs (easier)
DIY Staircase Panelling Tips
Measure carefully:
- Account for stair angle
- Each panel may be different
- Mock up with cardboard first
Use angled chair rail:
- Follows stair angle
- More complex cutting
- Professional look
Consider hiring out:
- Stair panelling is advanced DIY
- Professionals make it look easy
- Worth it for perfect results
I did my hallway panelling myself but hired a carpenter for the staircase portion ($400). Best decision—it looks seamless and professional.
Budget Breakdown: DIY Panelled Hallway
For a 10-foot wall with panelling:
Materials:
- MDF molding (chair rail, base, panel trim): $150
- Paint and primer: $50
- Adhesive and finishing nails: $20
- Sandpaper and caulk: $15
Tools (if you don’t have):
- Miter saw or rent: $50
- Nail gun or rent: $30
- Level and measuring tools: $25
Furniture and decor:
- Console table: $150-300
- Mirror: $80-150
- Light fixture: $150-300 (plus installation)
- Accessories: $50
Total DIY: $720-1,090 for complete look
Professional installation: Add $500-1,000 for panelling installation
Step-by-Step Installation Overview
1. Planning (crucial step):
- Measure walls carefully
- Design panel layout
- Account for outlets, switches, doors
- Purchase materials with 10% extra
2. Prep work:
- Clean walls
- Paint base color if doing two-tone
- Mark panel positions with pencil
3. Install base molding:
- Along floor
- Cut to length, miter corners
- Nail and glue in place
- Fill nail holes, caulk seams
4. Install chair rail:
- At top of panelling height (32-36 inches)
- Level is critical
- Secure well (this bears weight visually)
5. Install panel frames:
- Cut molding to create rectangles
- Glue and nail in place
- Keep spacing consistent
- Check level constantly
6. Finishing:
- Fill all nail holes
- Caulk all seams and gaps
- Sand smooth
- Prime and paint
Time estimate:
- Planning and shopping: 4 hours
- Installation: 12-20 hours (depending on complexity)
- Finishing and painting: 8 hours
- Total: One long weekend or two weekends
Common Panelling Mistakes
Mistake #1: Poor planning: Uneven panels, awkward spacing. Use tape to mock up first.
Mistake #2: Not level: Crooked panelling is immediately obvious. Check constantly.
Mistake #3: Skipping caulk: Gaps and seams ruin the built-in look. Caulk everything.
Mistake #4: Wrong proportions: Panels too small, too large, or wrong ratio. Research before deciding.
Mistake #5: Cheap materials: Warped, damaged molding shows. Inspect before buying.
Mistake #6: Rushing paint: Drips, thin coverage, brush marks. Take your time on finish.
Mistake #7: Inconsistent spacing: Each panel should match. Measure, don’t eyeball.
Panelling for Different Hallway Styles
Traditional/Classic (like inspo):
- Soft colors (sage, navy, gray)
- Gold accents
- Wood console
- Brass lighting
Modern/Contemporary:
- All white or monochromatic
- Simpler panel shapes
- Minimal decor
- Sleek lighting
Cottage/Coastal:
- White or cream panelling
- Natural wood accents
- Casual styling
- Light and airy
Transitional:
- Mix of traditional and modern
- Neutral panelling
- Updated hardware
- Balanced approach
The fundamentals work across styles—just adjust colors and accessories.
Maintenance and Care
Daily:
- Wipe down console
- Keep clutter off surfaces
Weekly:
- Dust molding and trim
- Vacuum or sweep floor
- Clean mirror
Monthly:
- Dust baseboards and chair rail
- Check for scuffs and touch up paint
- Deep clean console
Annually:
- Inspect caulking (replace if cracking)
- Touch up paint as needed
- Check molding is secure
Panelling actually protects walls and is easier to maintain than plain painted walls in high-traffic areas.
When to Hire a Professional
Consider hiring if:
- Extending to stairs (complex angles)
- Don’t own tools (rental costs add up)
- Limited DIY experience
- Want perfect results guaranteed
- Time is more valuable than money
DIY-able if:
- Straight walls only
- Have basic tools
- Comfortable with miter saw
- Patient and detail-oriented
- Following a plan
I did my hallway walls myself and hired out the stairs. This hybrid approach saved money while ensuring professional results where it mattered most.
Final Thoughts: Transform Your Hallway
Wall panelling transforms a basic hallway into an architectural moment. The inspiration image proves it: soft sage green panelling with crisp white above, warm wood console, gold-framed mirror, brass lantern pendant, and simple styling. It’s traditional elegance that feels fresh and intentional.
This project requires planning, patience, and precision—but it’s absolutely achievable for motivated DIYers. The impact? Your hallway goes from “fine, I guess” to “wait, let me show you this” in one weekend.
Start with careful planning. Measure twice, cut once. Mock up your layout before committing. Take your time with installation—rushed panelling looks amateur. Don’t skip the finishing work—caulking and painting make all the difference.
My panelled hallway is the single best design decision I made in my home. Every time I walk through, I feel that little moment of pride. Total investment: about $650 and two solid weekends of work. Impact: looks like a $5,000 professional installation.
Your hallway deserves more than builder-grade blah. Give it the architectural treatment, and create something beautiful that adds real value to your home. 🙂